Watercolour and Gouache Painting Sketch Easel
Watercolour sketching in the great outdoors is great for really immersing yourself in the landscape. Sitting on a bench or the grass with a sketchbook and travel tin of watercolour paints works pretty well. But for scenes where you need to be stood up, it can be much easier with a sketch easel.
There are plenty of commercially available small easels and pochade boxes. As well as lots of people making their own sketch easels many of whom can be found on Sketch Easel Builders Group on FaceBook. Many make use of standard camera tripods so the box or easel can be used either on a tripod or on your lap making them super portable.
My lightweight painting setup fits nicely into a small bag or rucksack so the easel needs to be able to fit in the same bounds.

DIY Sketch Easel
This is the approach I took to build a lightweight easel for watercolour painting.
I’ve opted for A4 boards as the basis as this is useable for my sketchbooks and A5 pads.
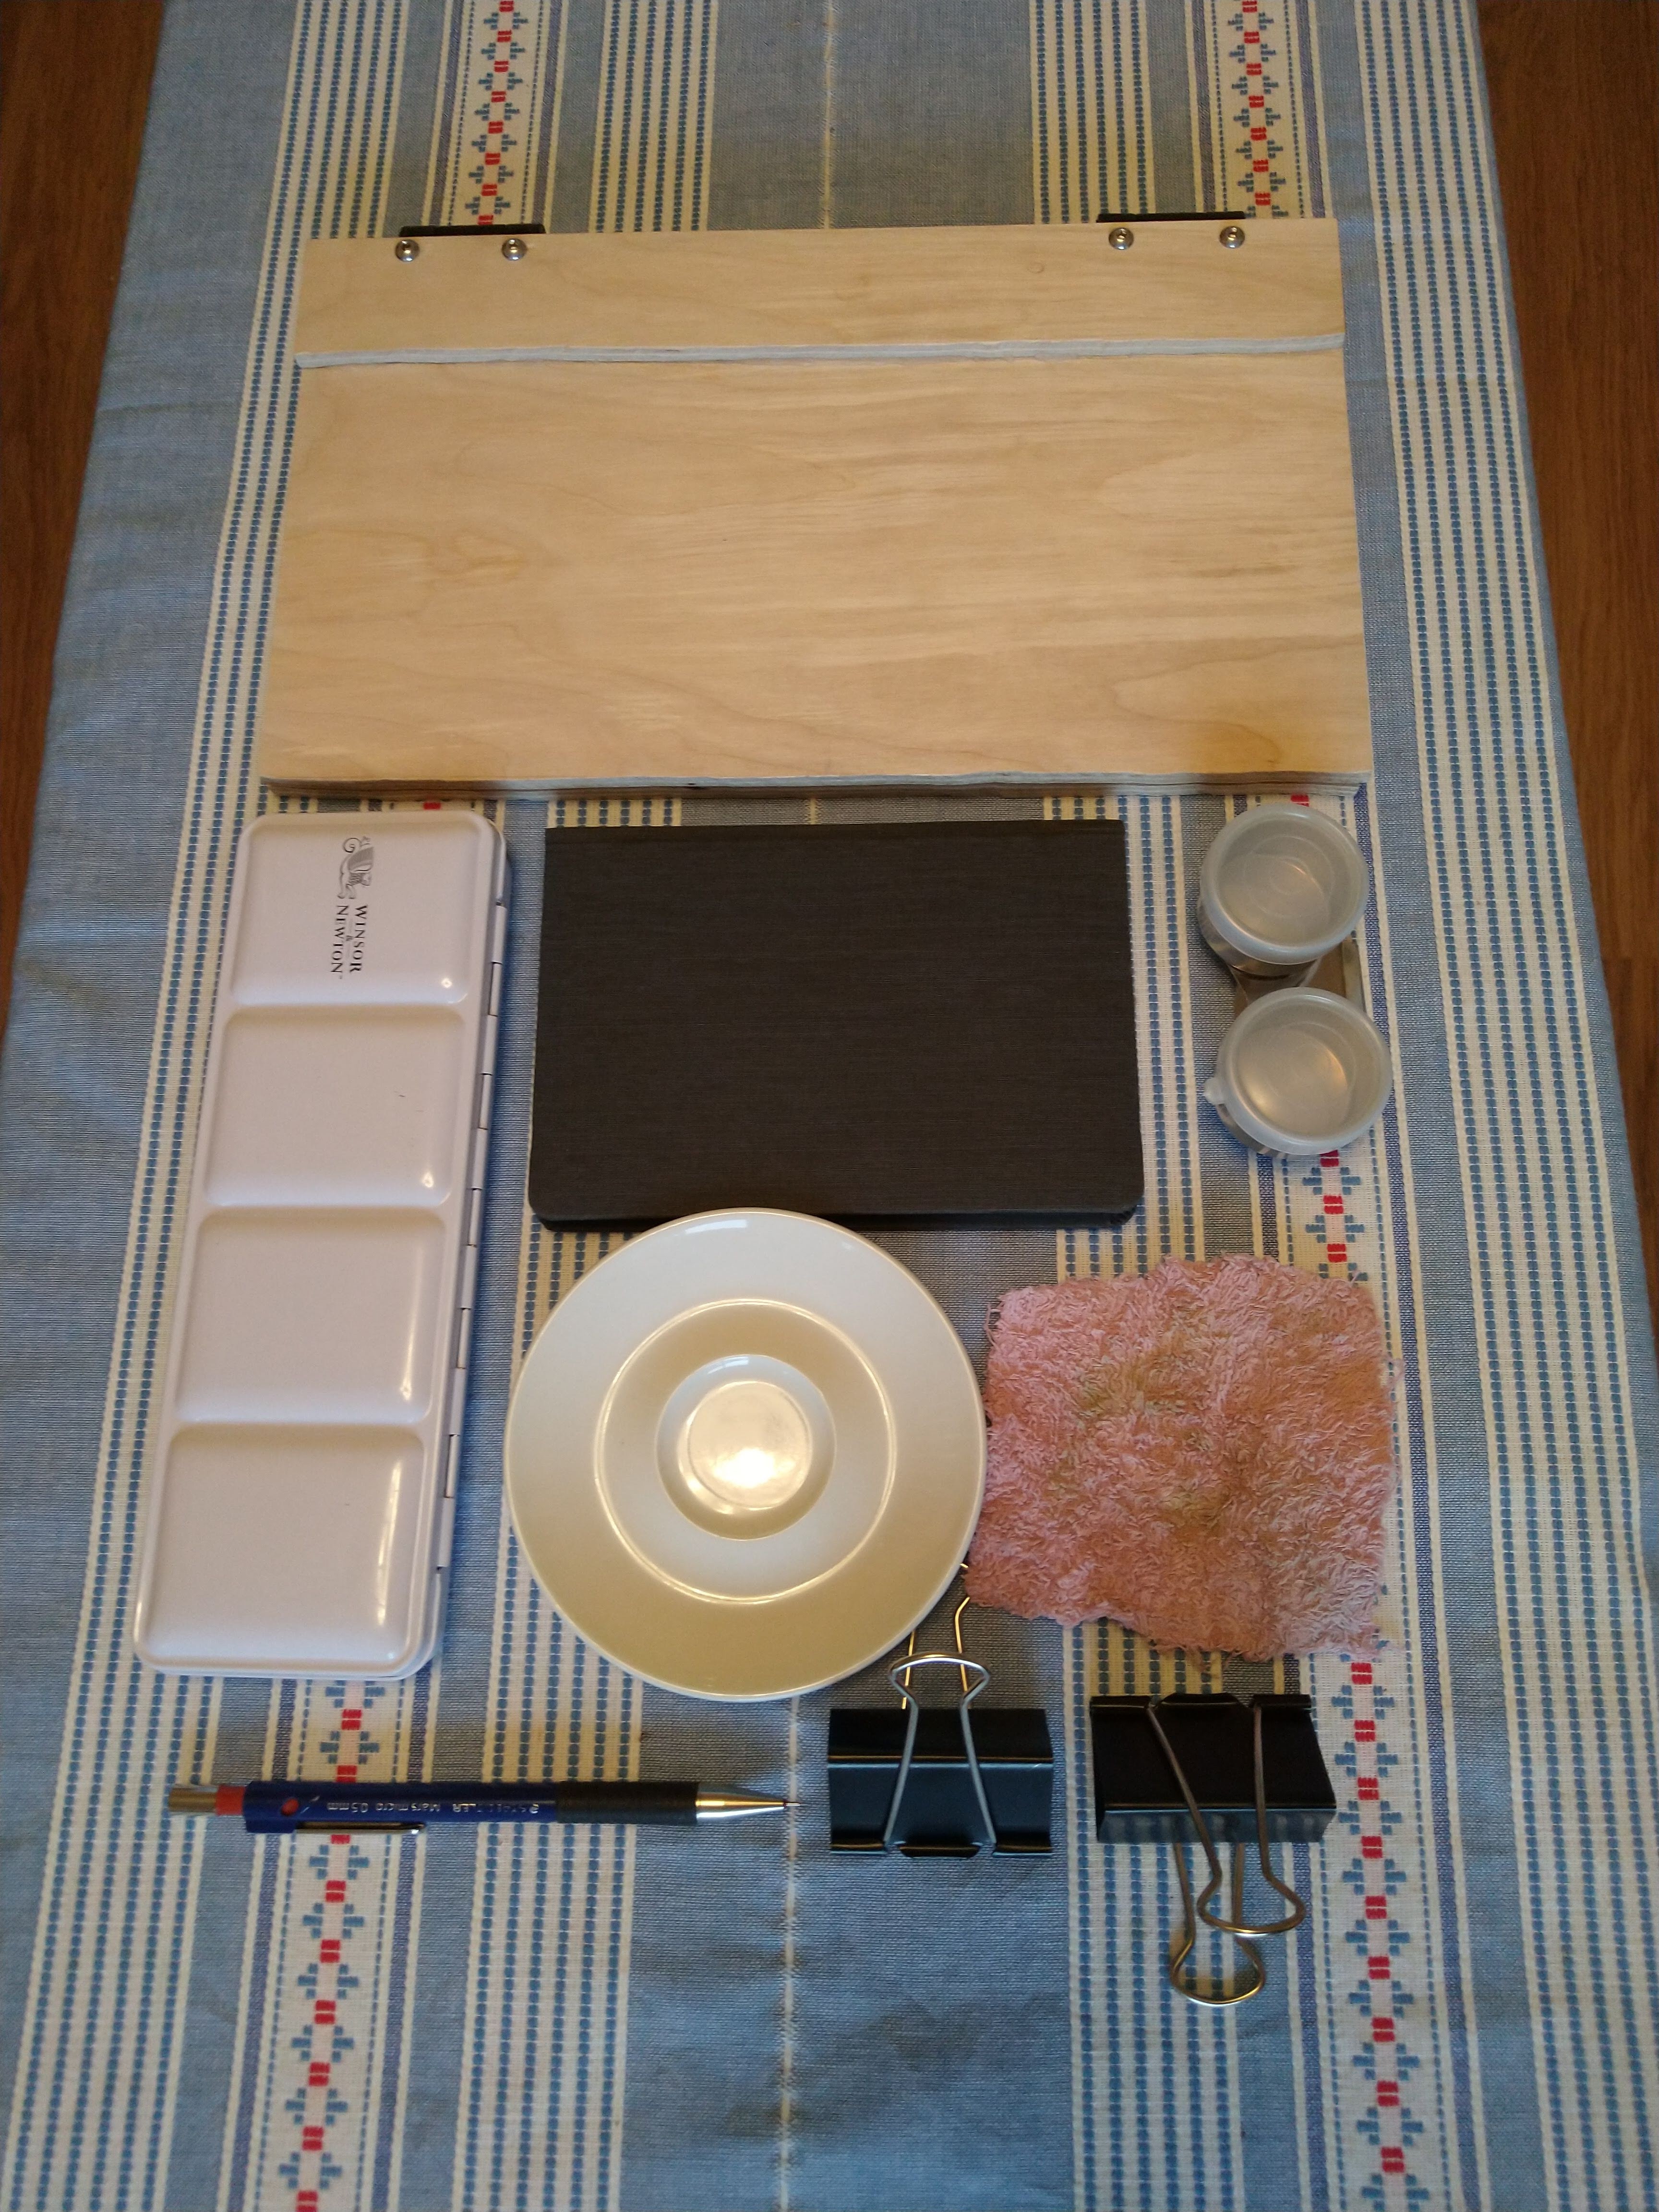
Materials
- A4 6mm Plywood Sheets 2of 6mm Birch Plywood A4-300x210x 6mm
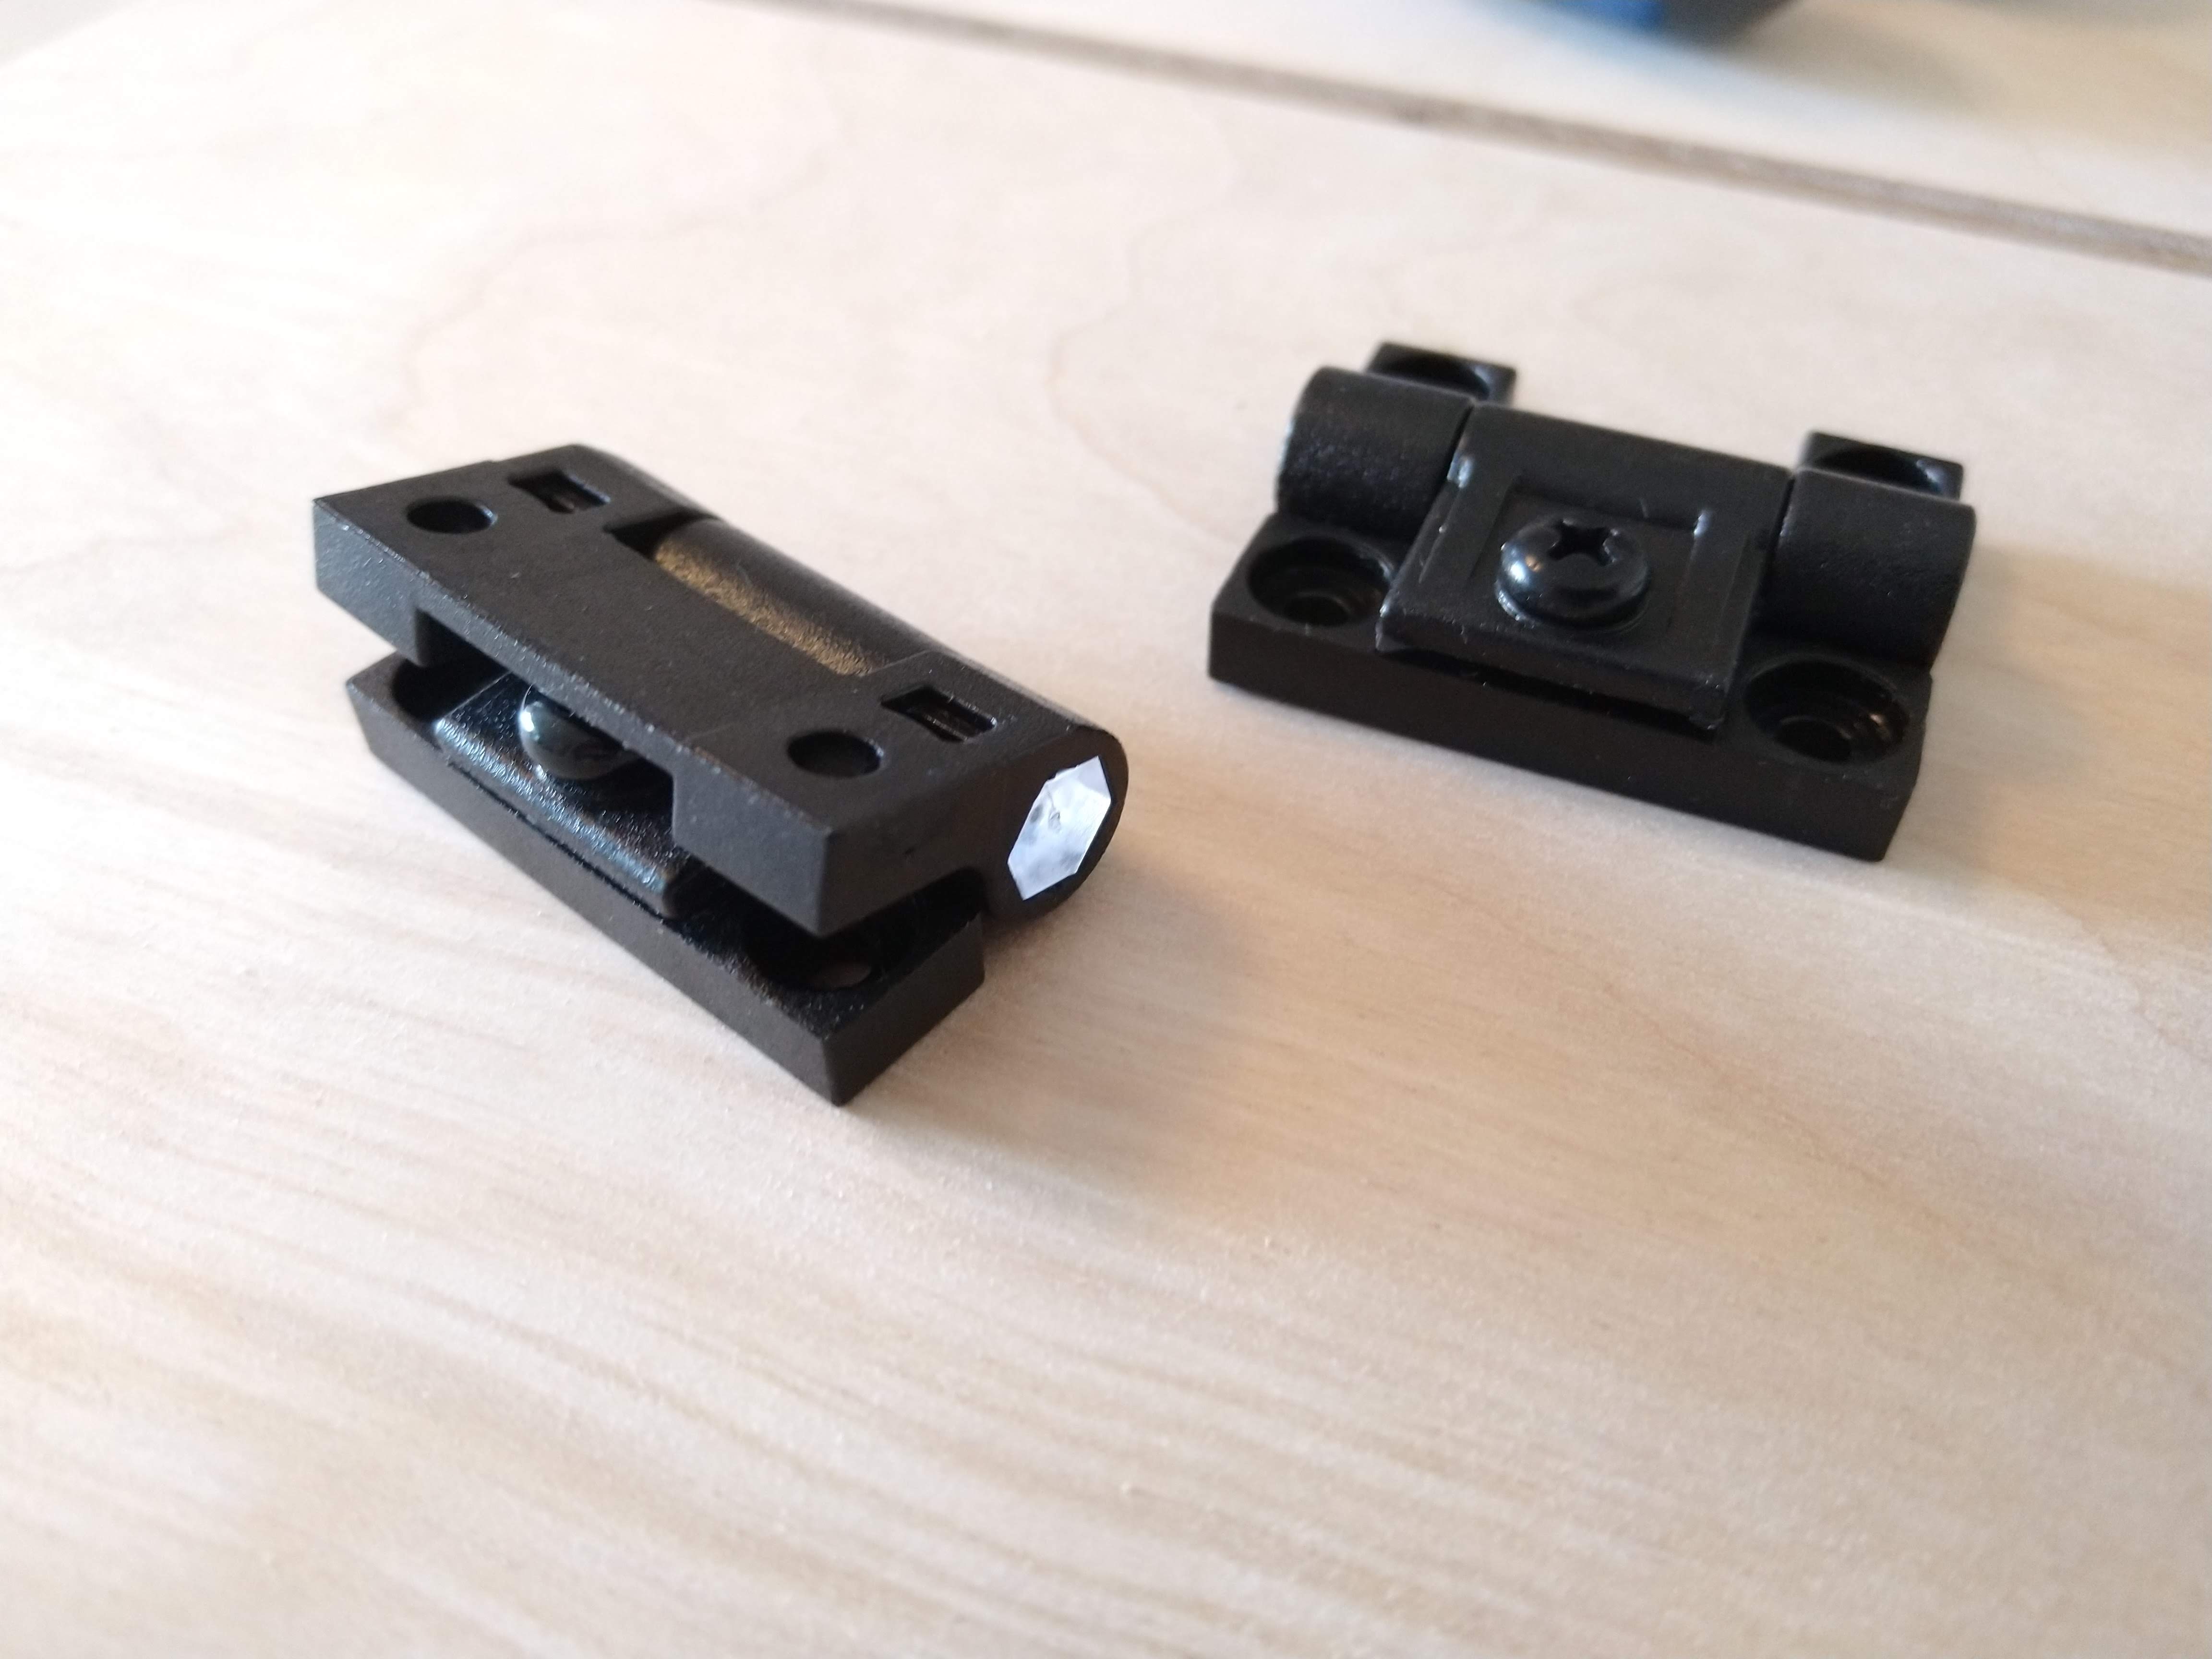
- Friction hinges Adjustable Torque Position Control Hinge
- T Nut 1/4”-20 4 Pronged Tee Nut T-Nut
- Wood glue
- M4 bolts and nuts
Steps
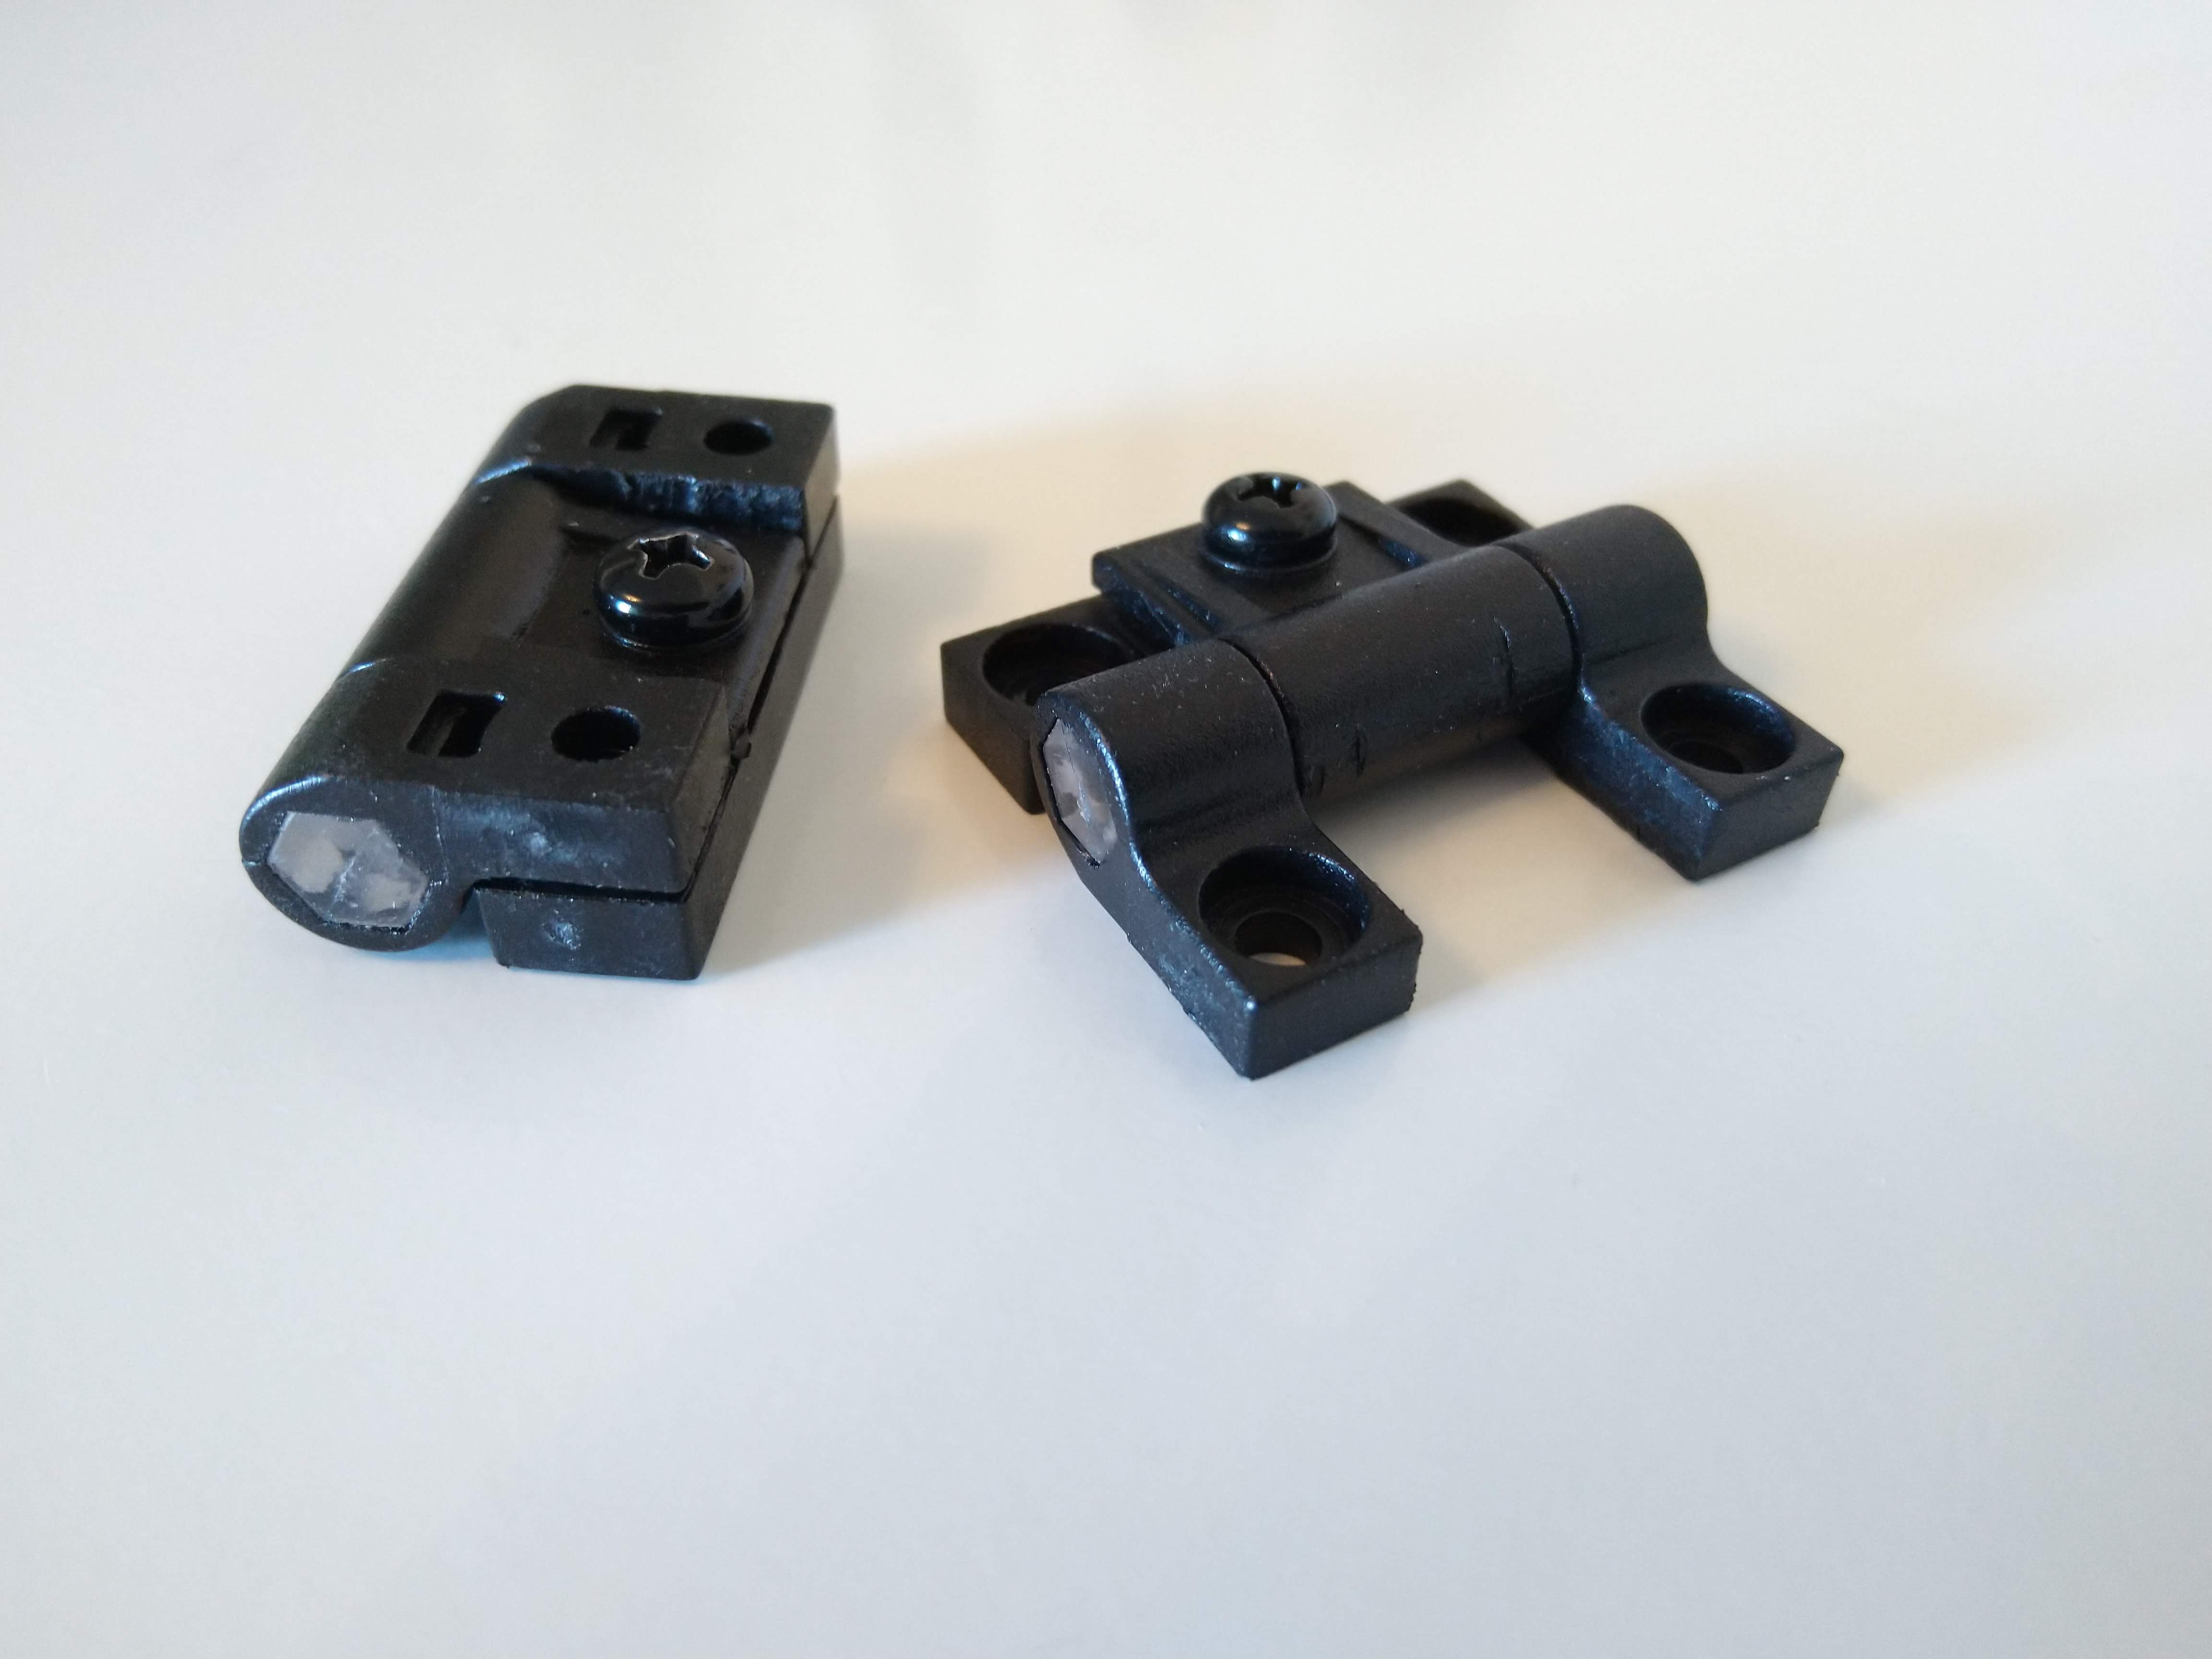
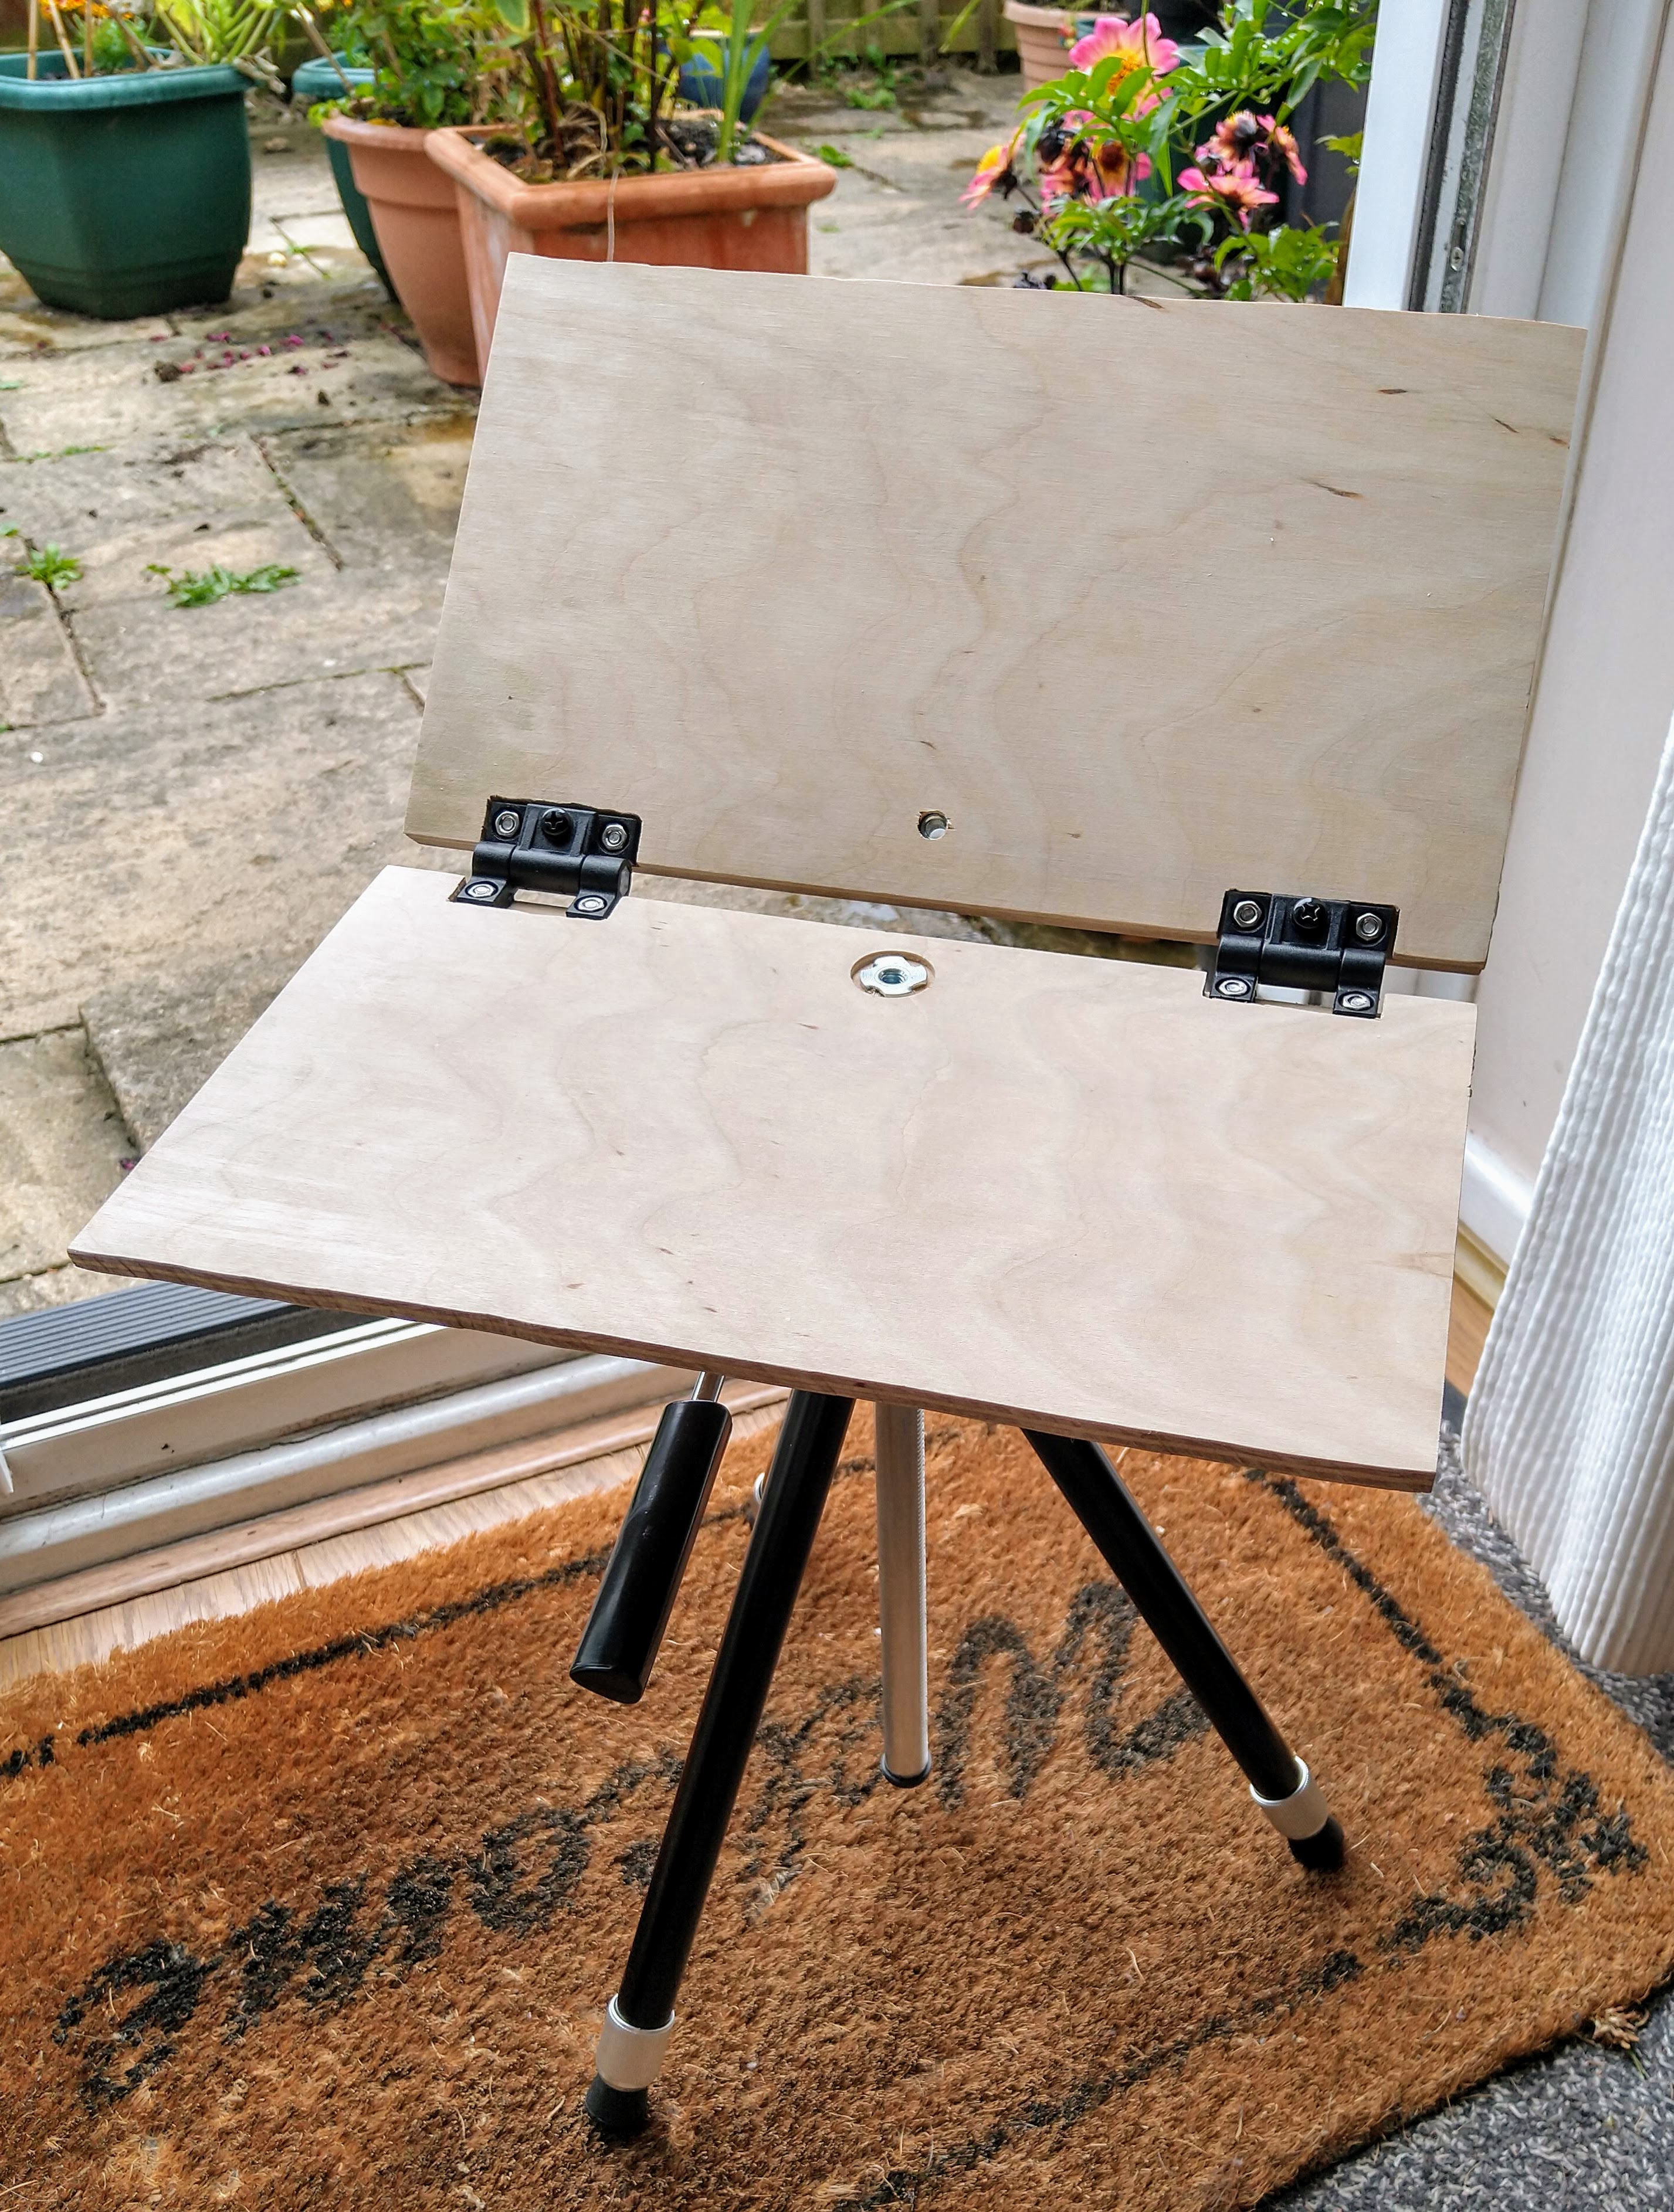
Remove section from the hinges. So that they can fold over completely.
Cut strips off the long edges, about 1.5 inch thick. These are needed so we can reinforce the boards and also recess the hinges. This is what lets us close the easel flat.
Clamp the true edges together. Cut notches out for the hinges from both pieces whilst clamped.

Glue and clamp the strips with the true edges aligned. I cut mine crudely with a coping saw so the rough edge is quite uneven.
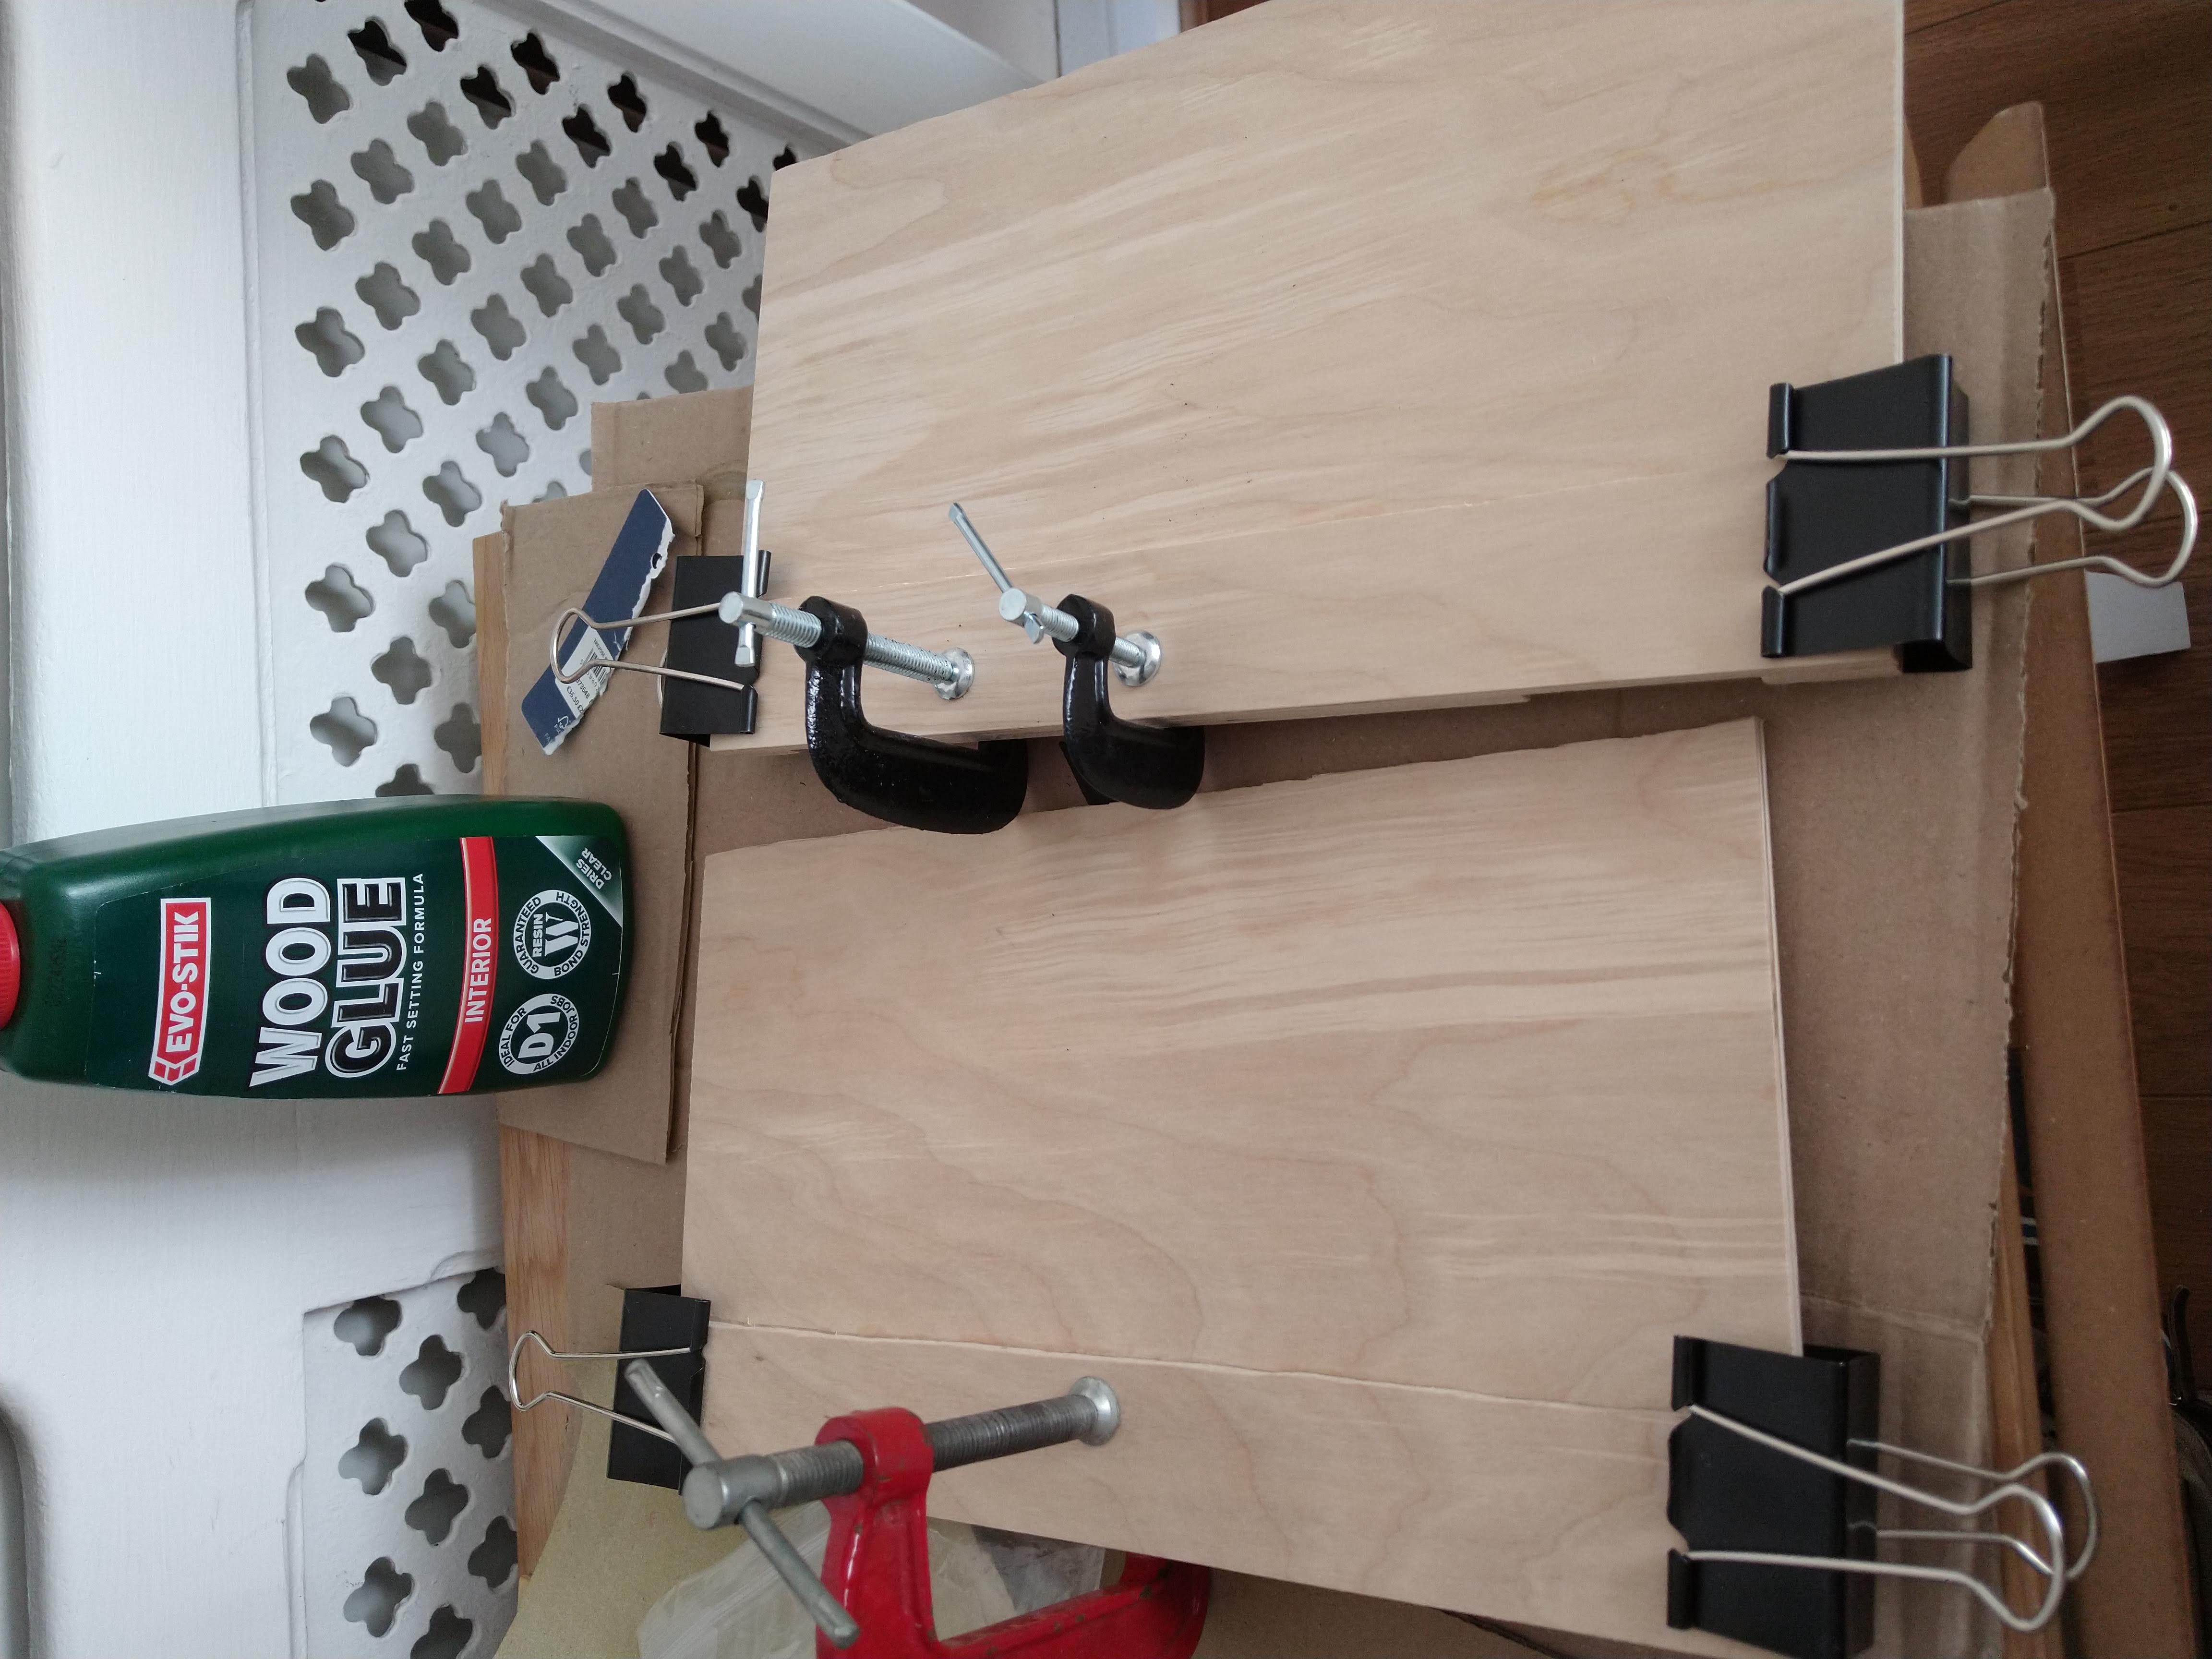
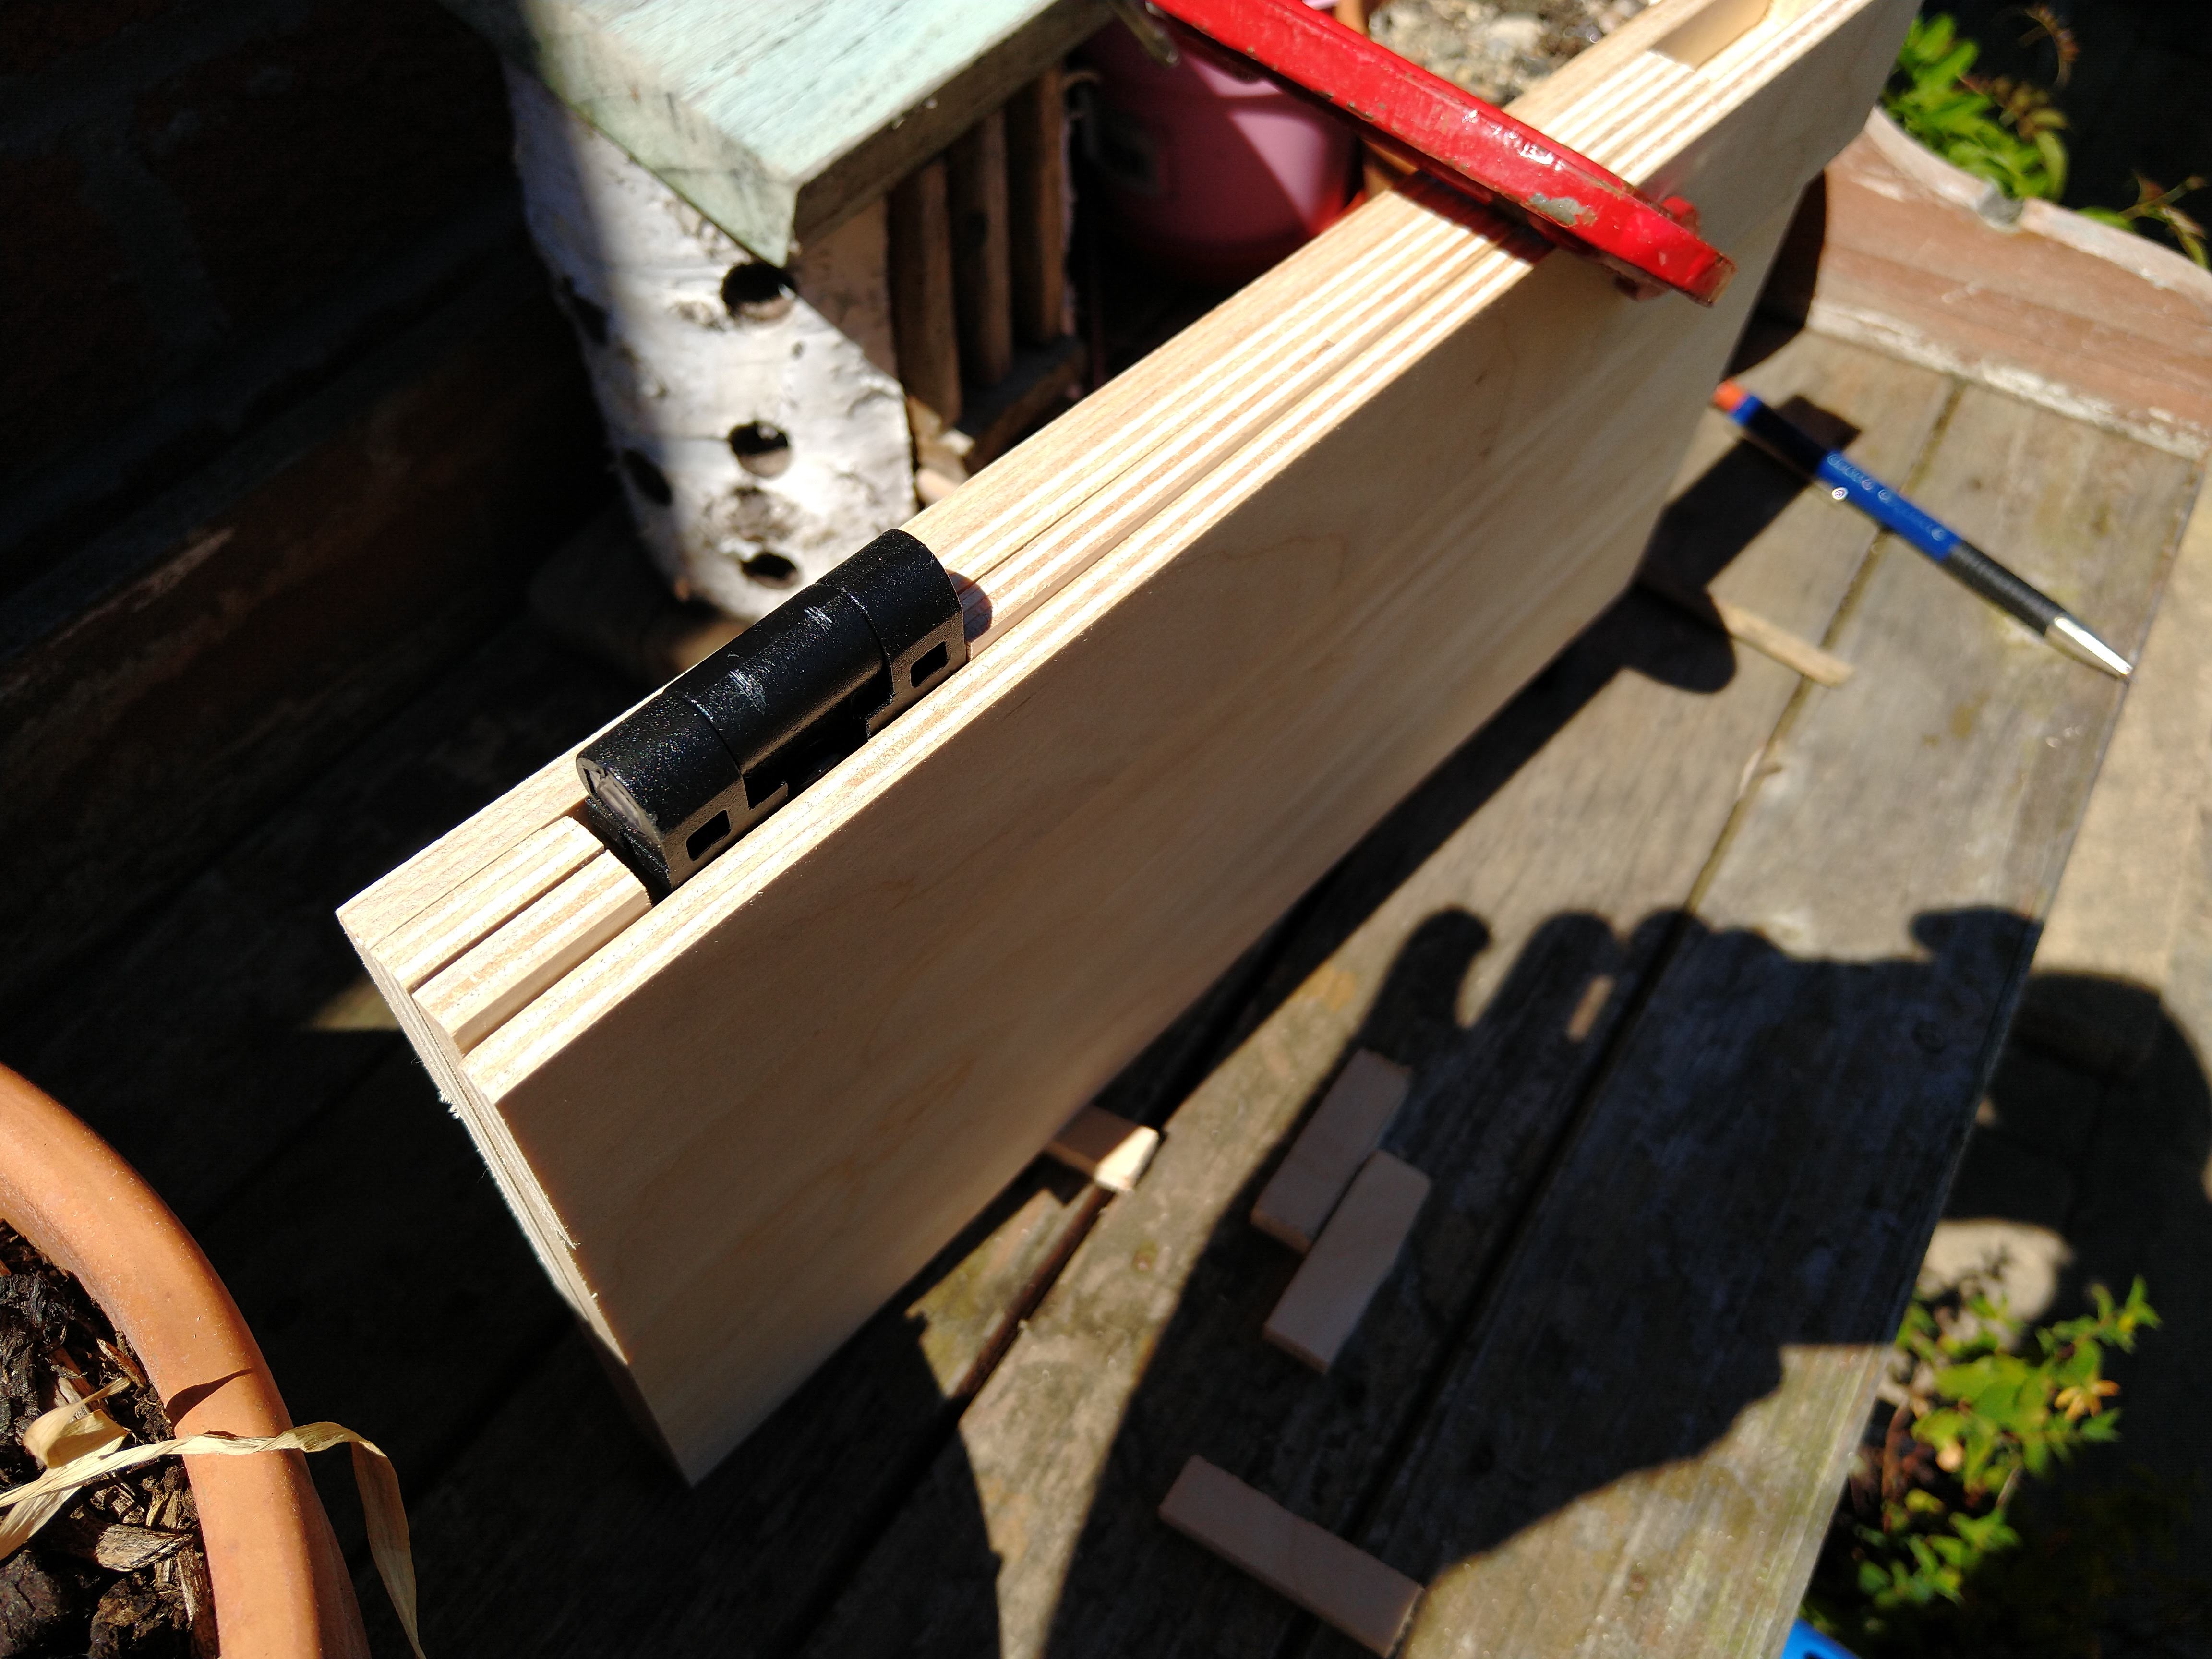
Drill holes for the hinges. Position the boards and line the hinges up before marking the hole positions. Fix the hinges using the M4 bolts and nuts.
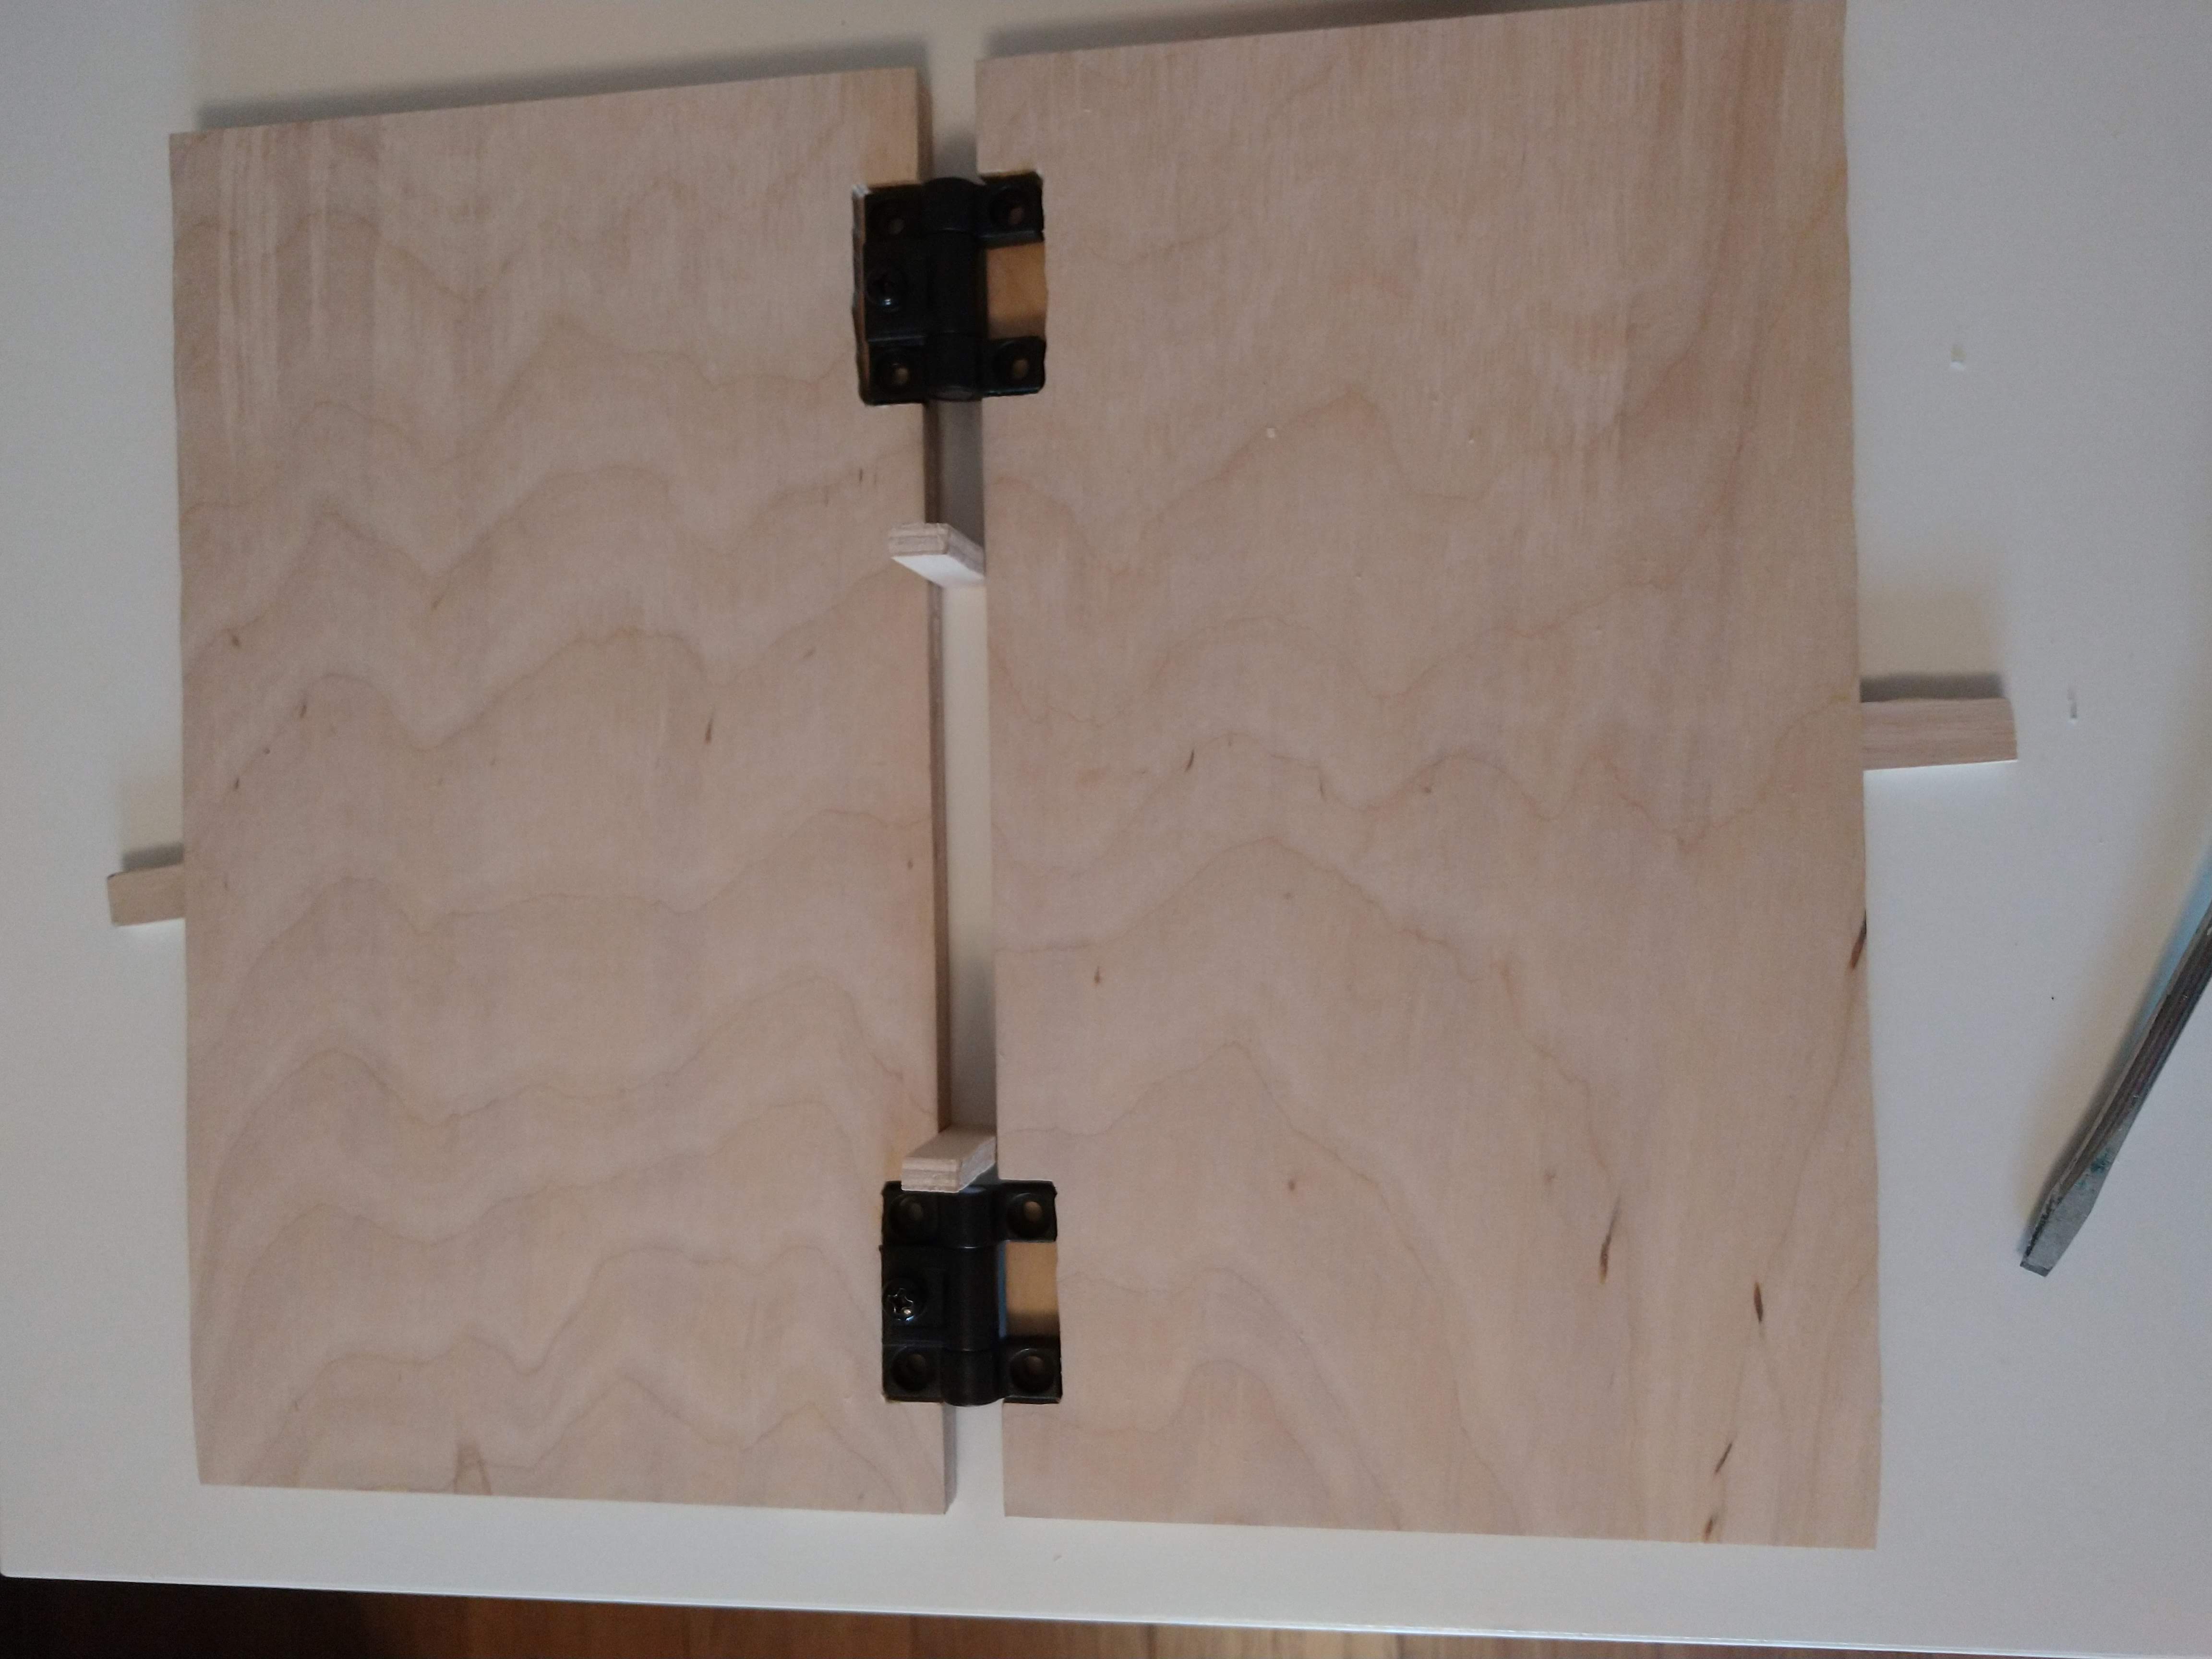

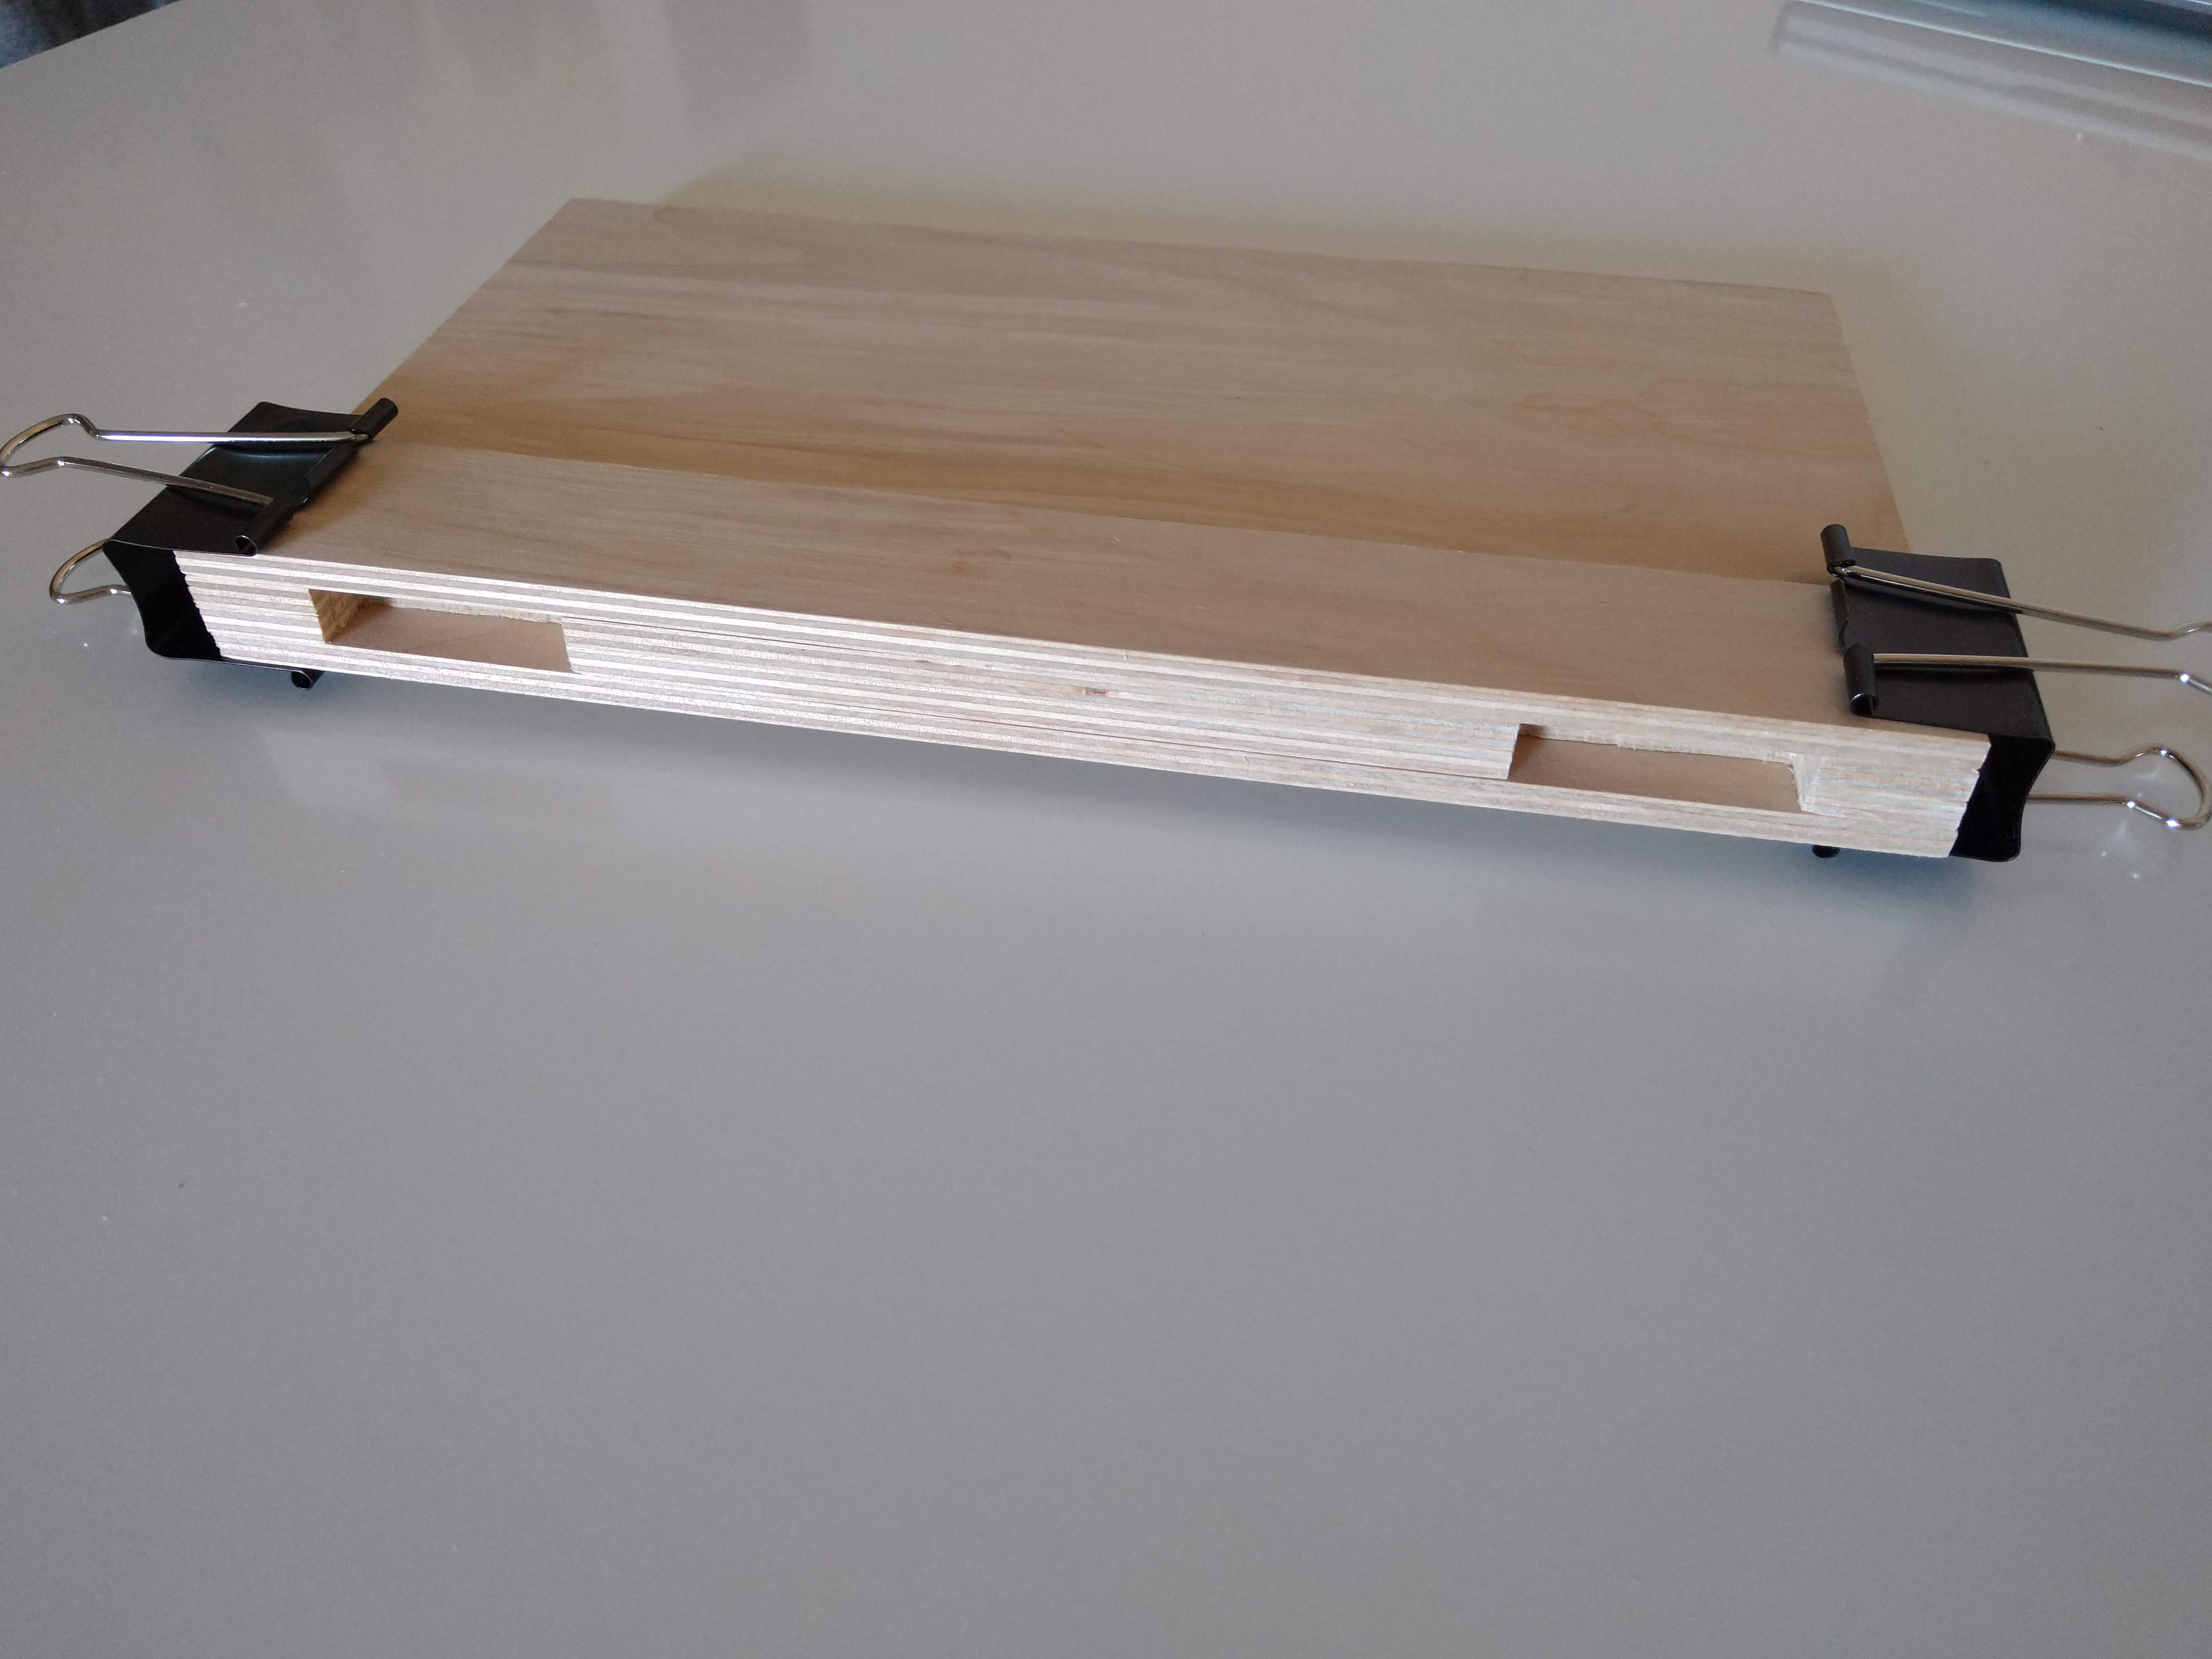
Drill recess and hole for the T nut. Hammer the T nut in. I may add a second T nut on the other half but from the other direction later.
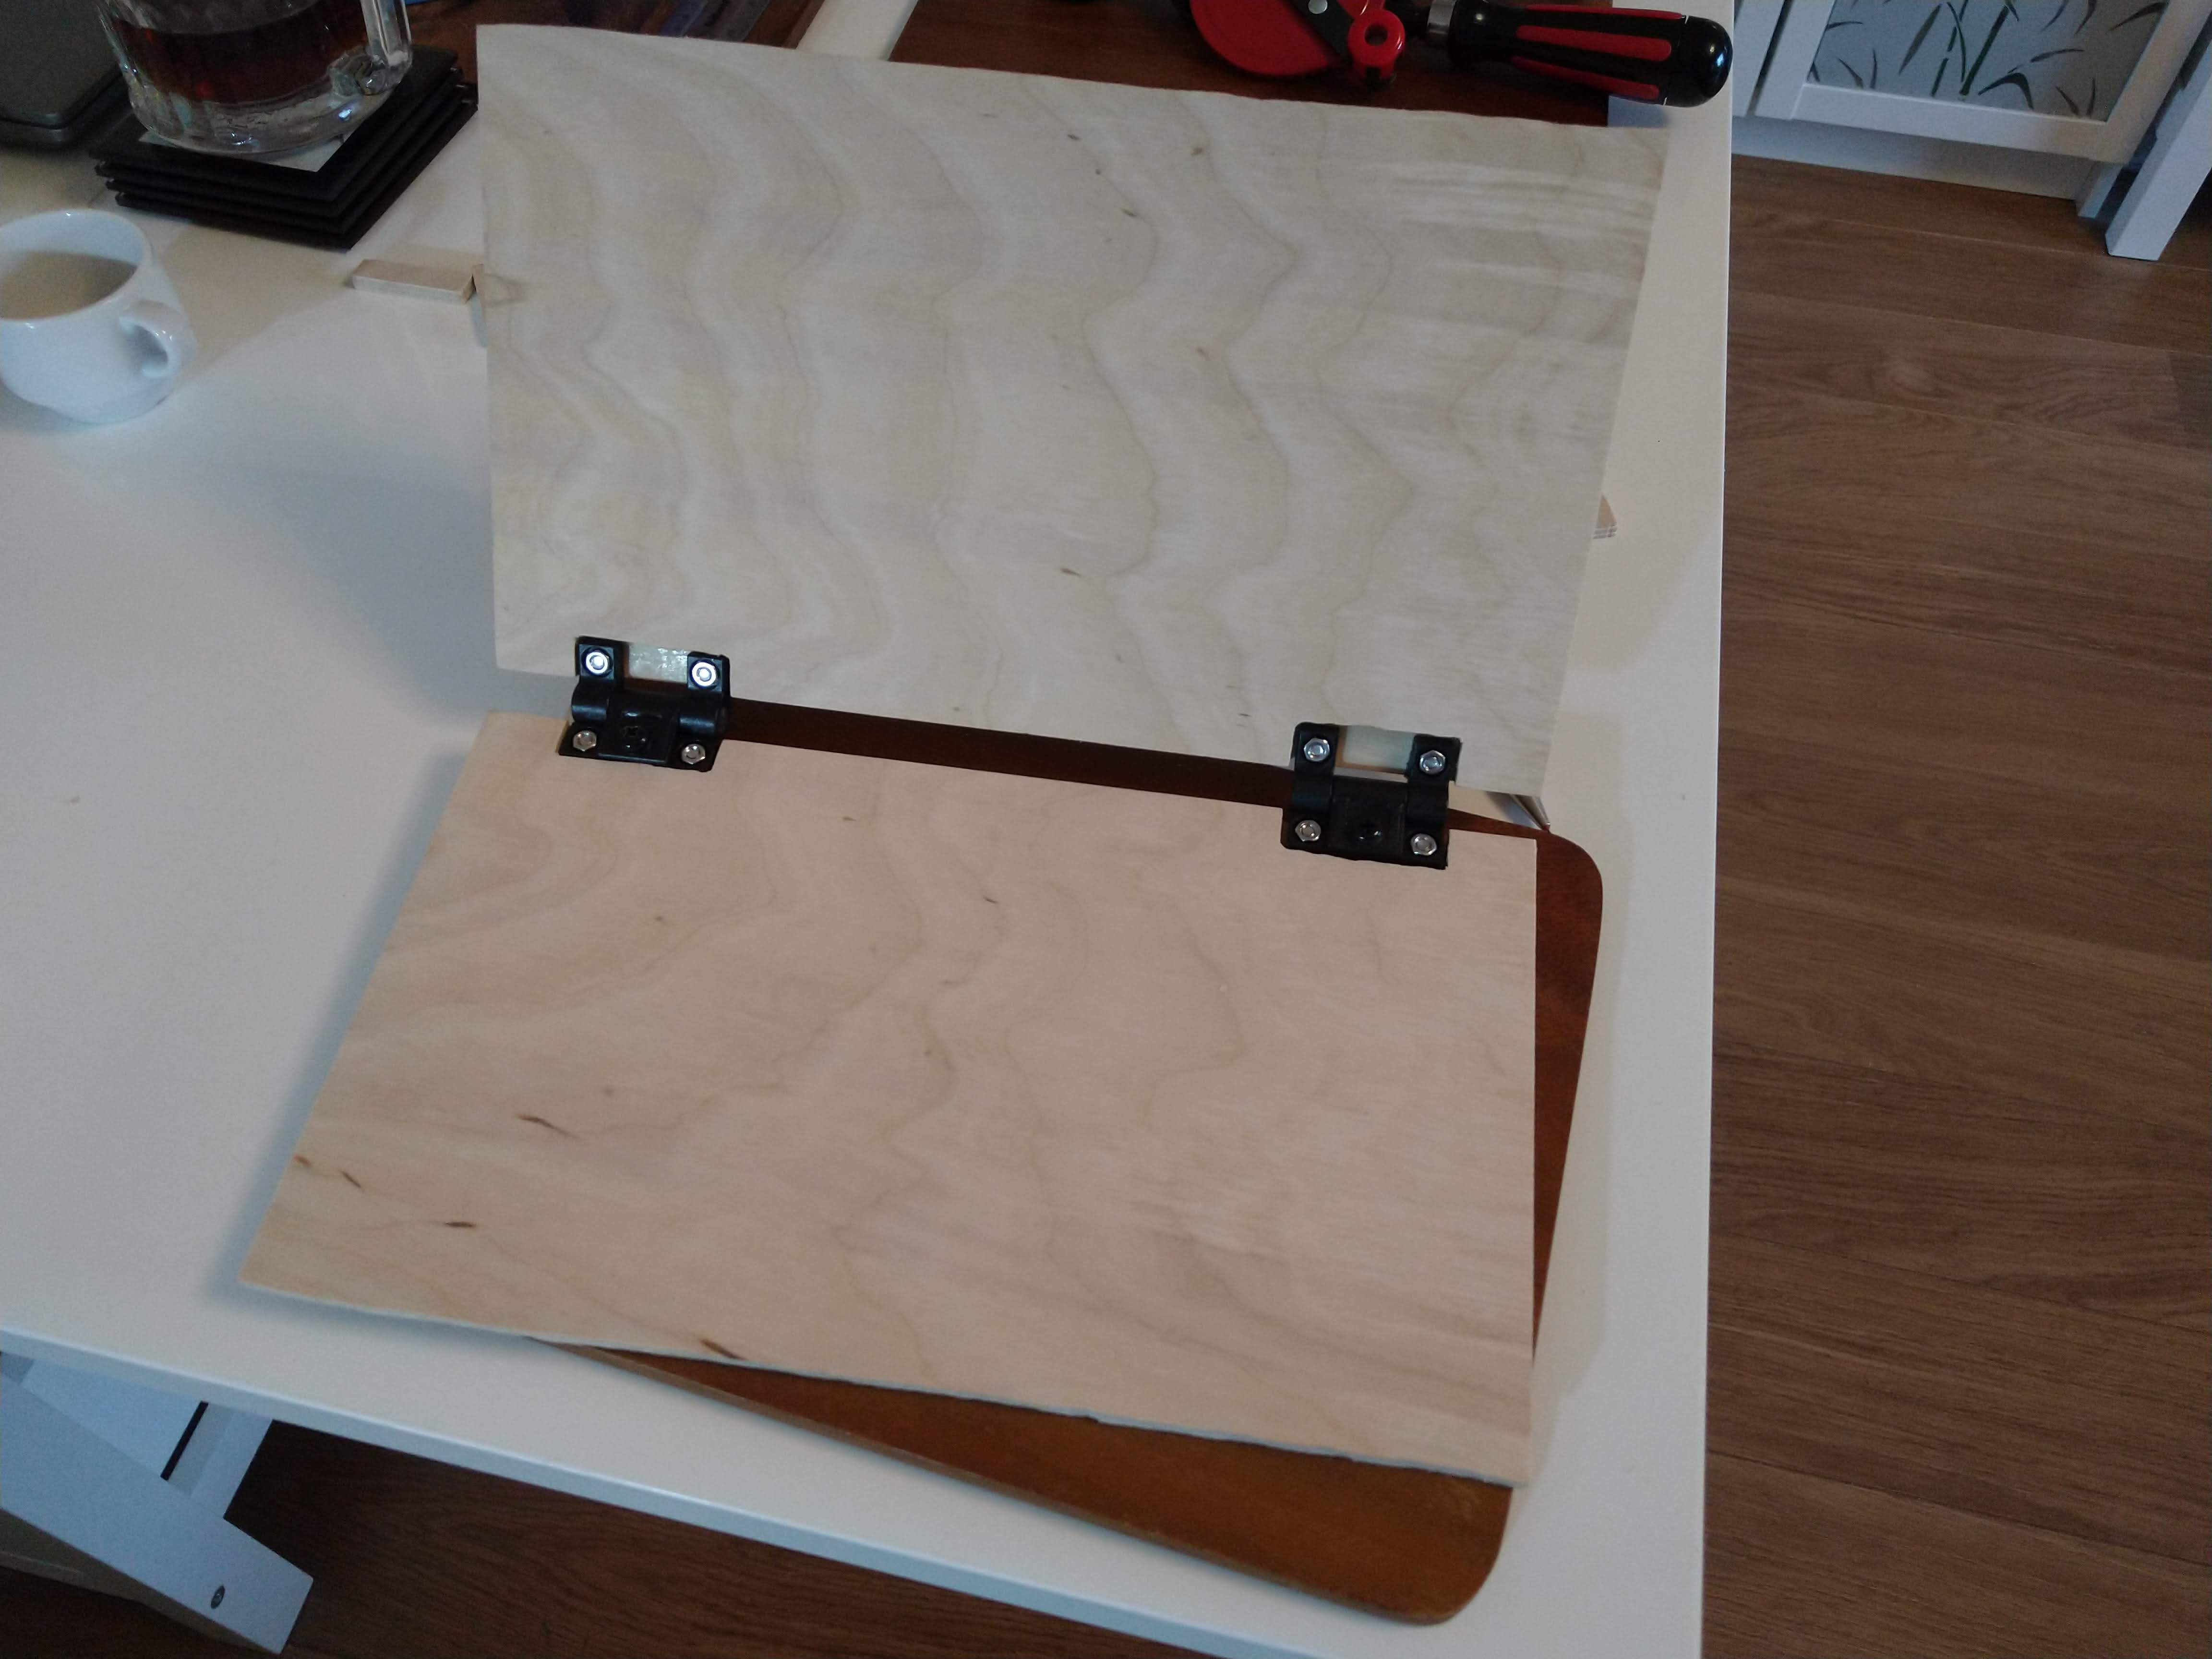
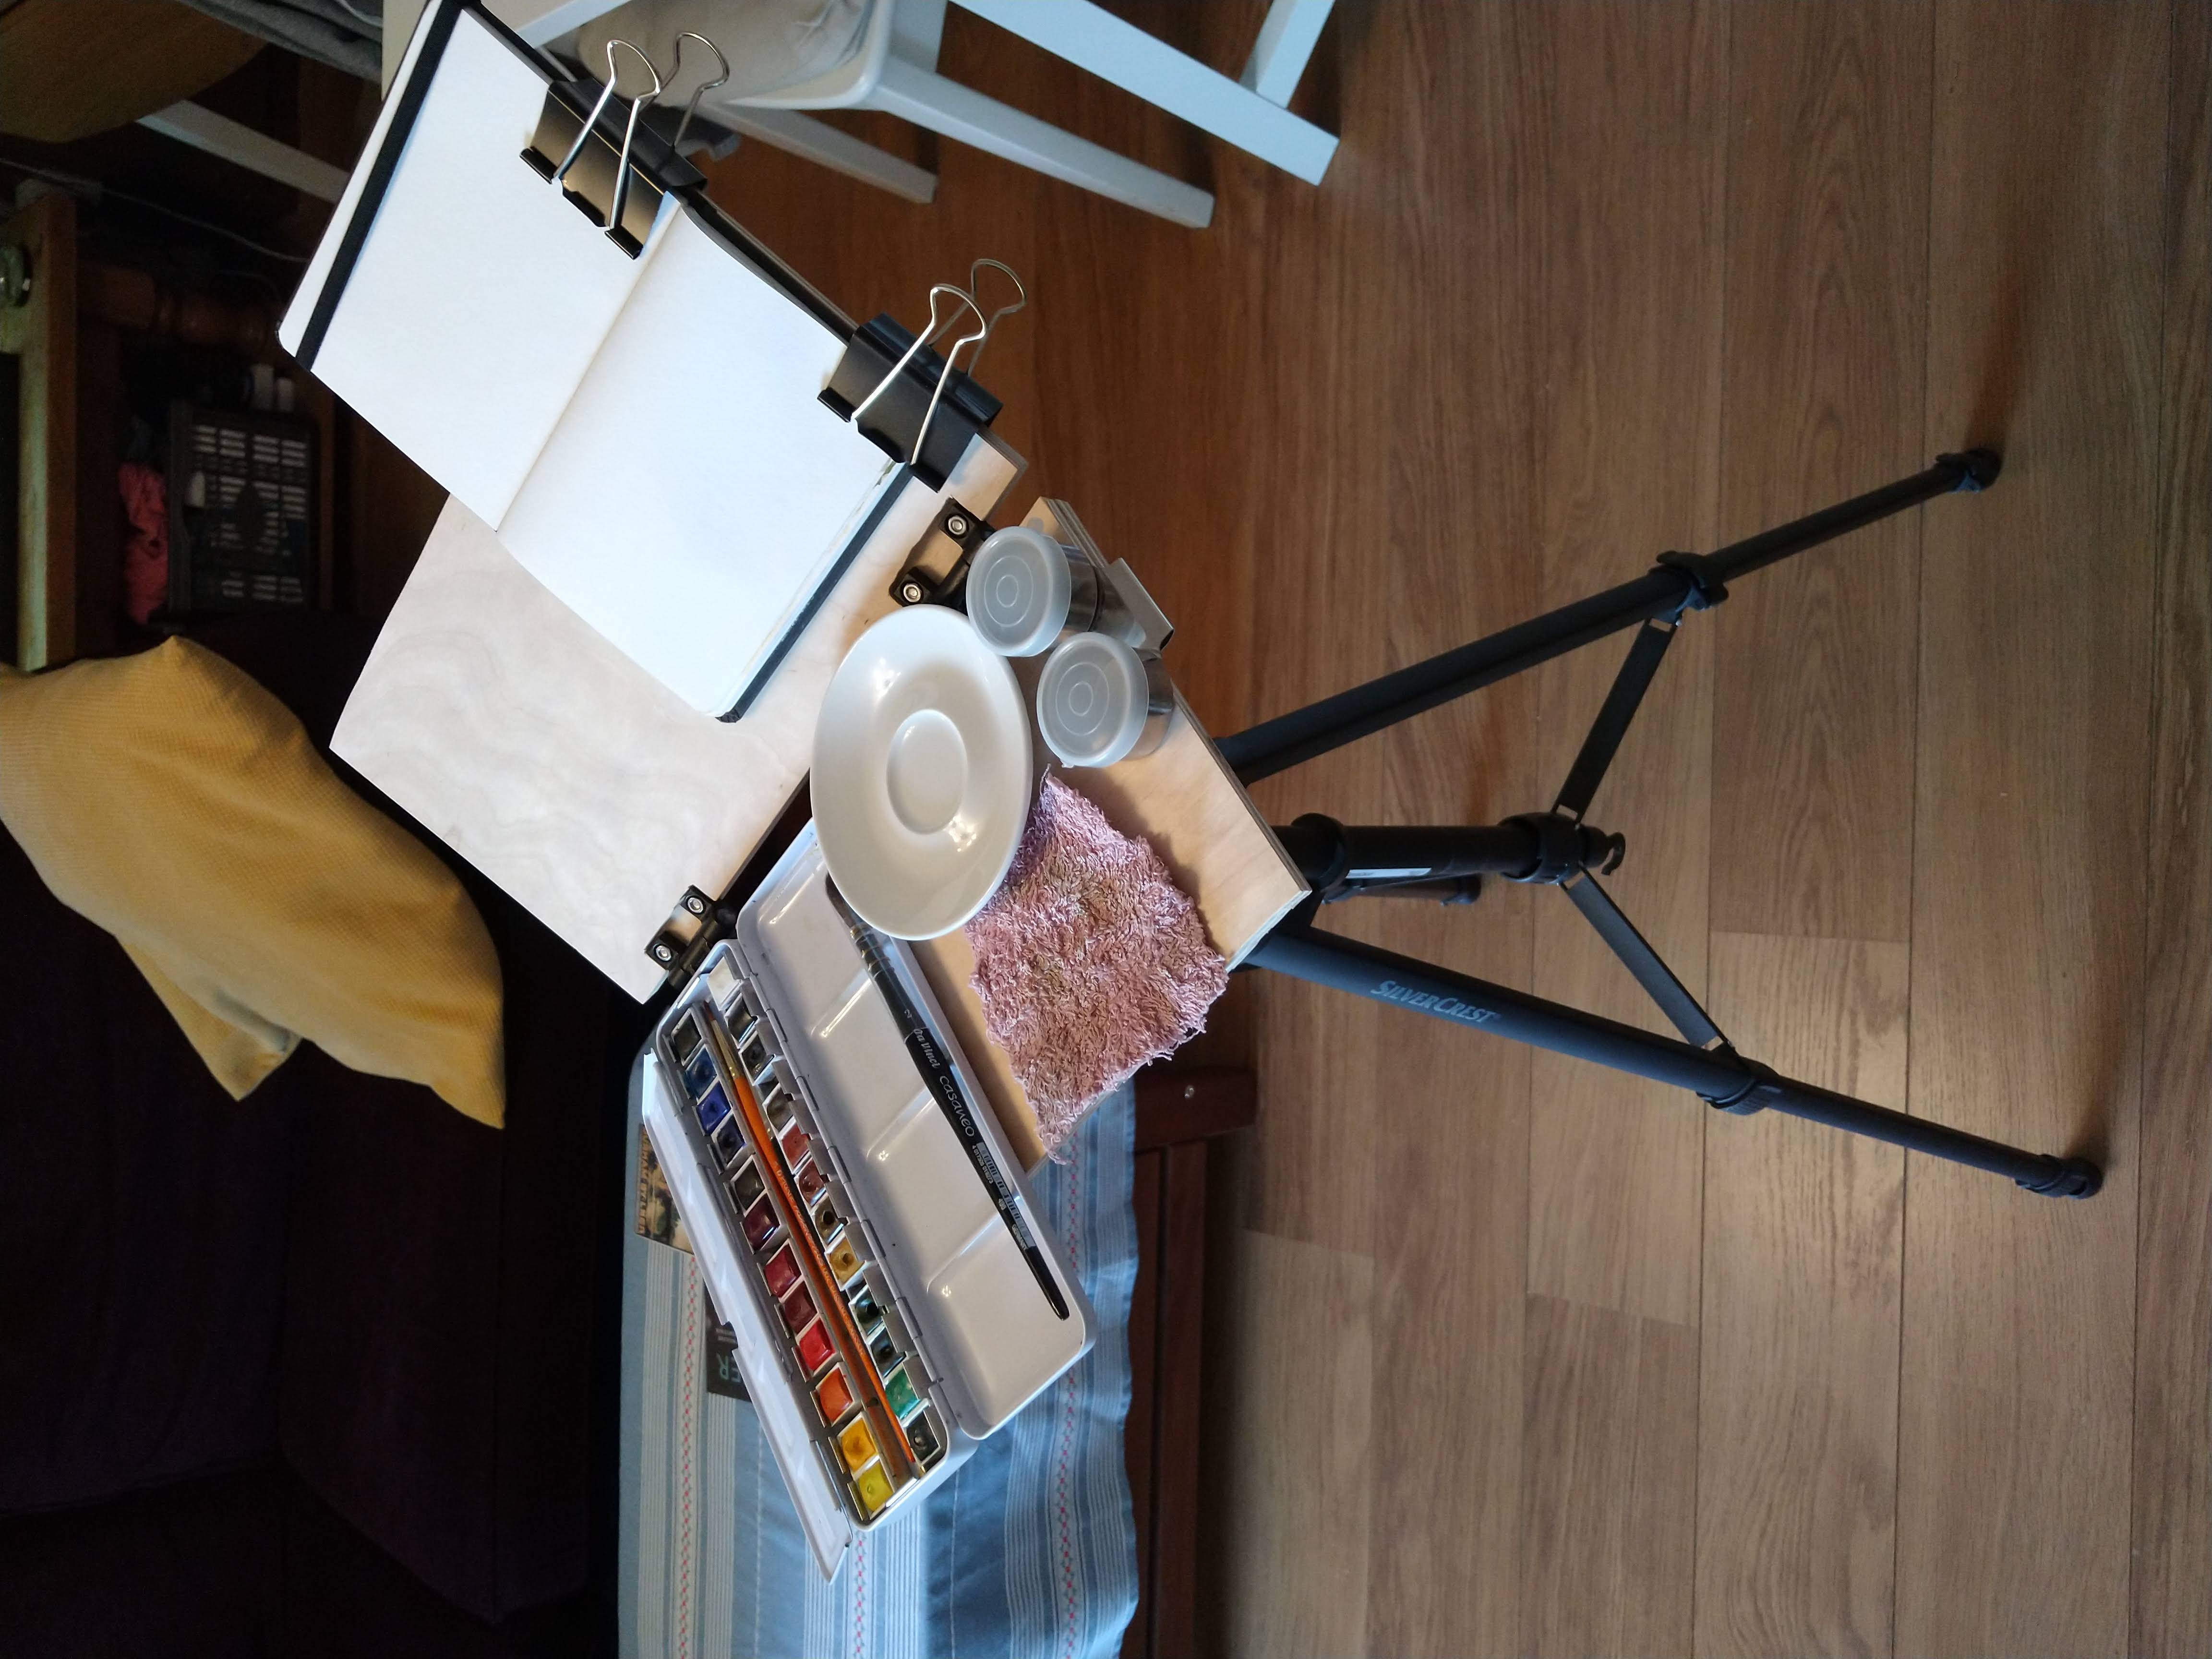
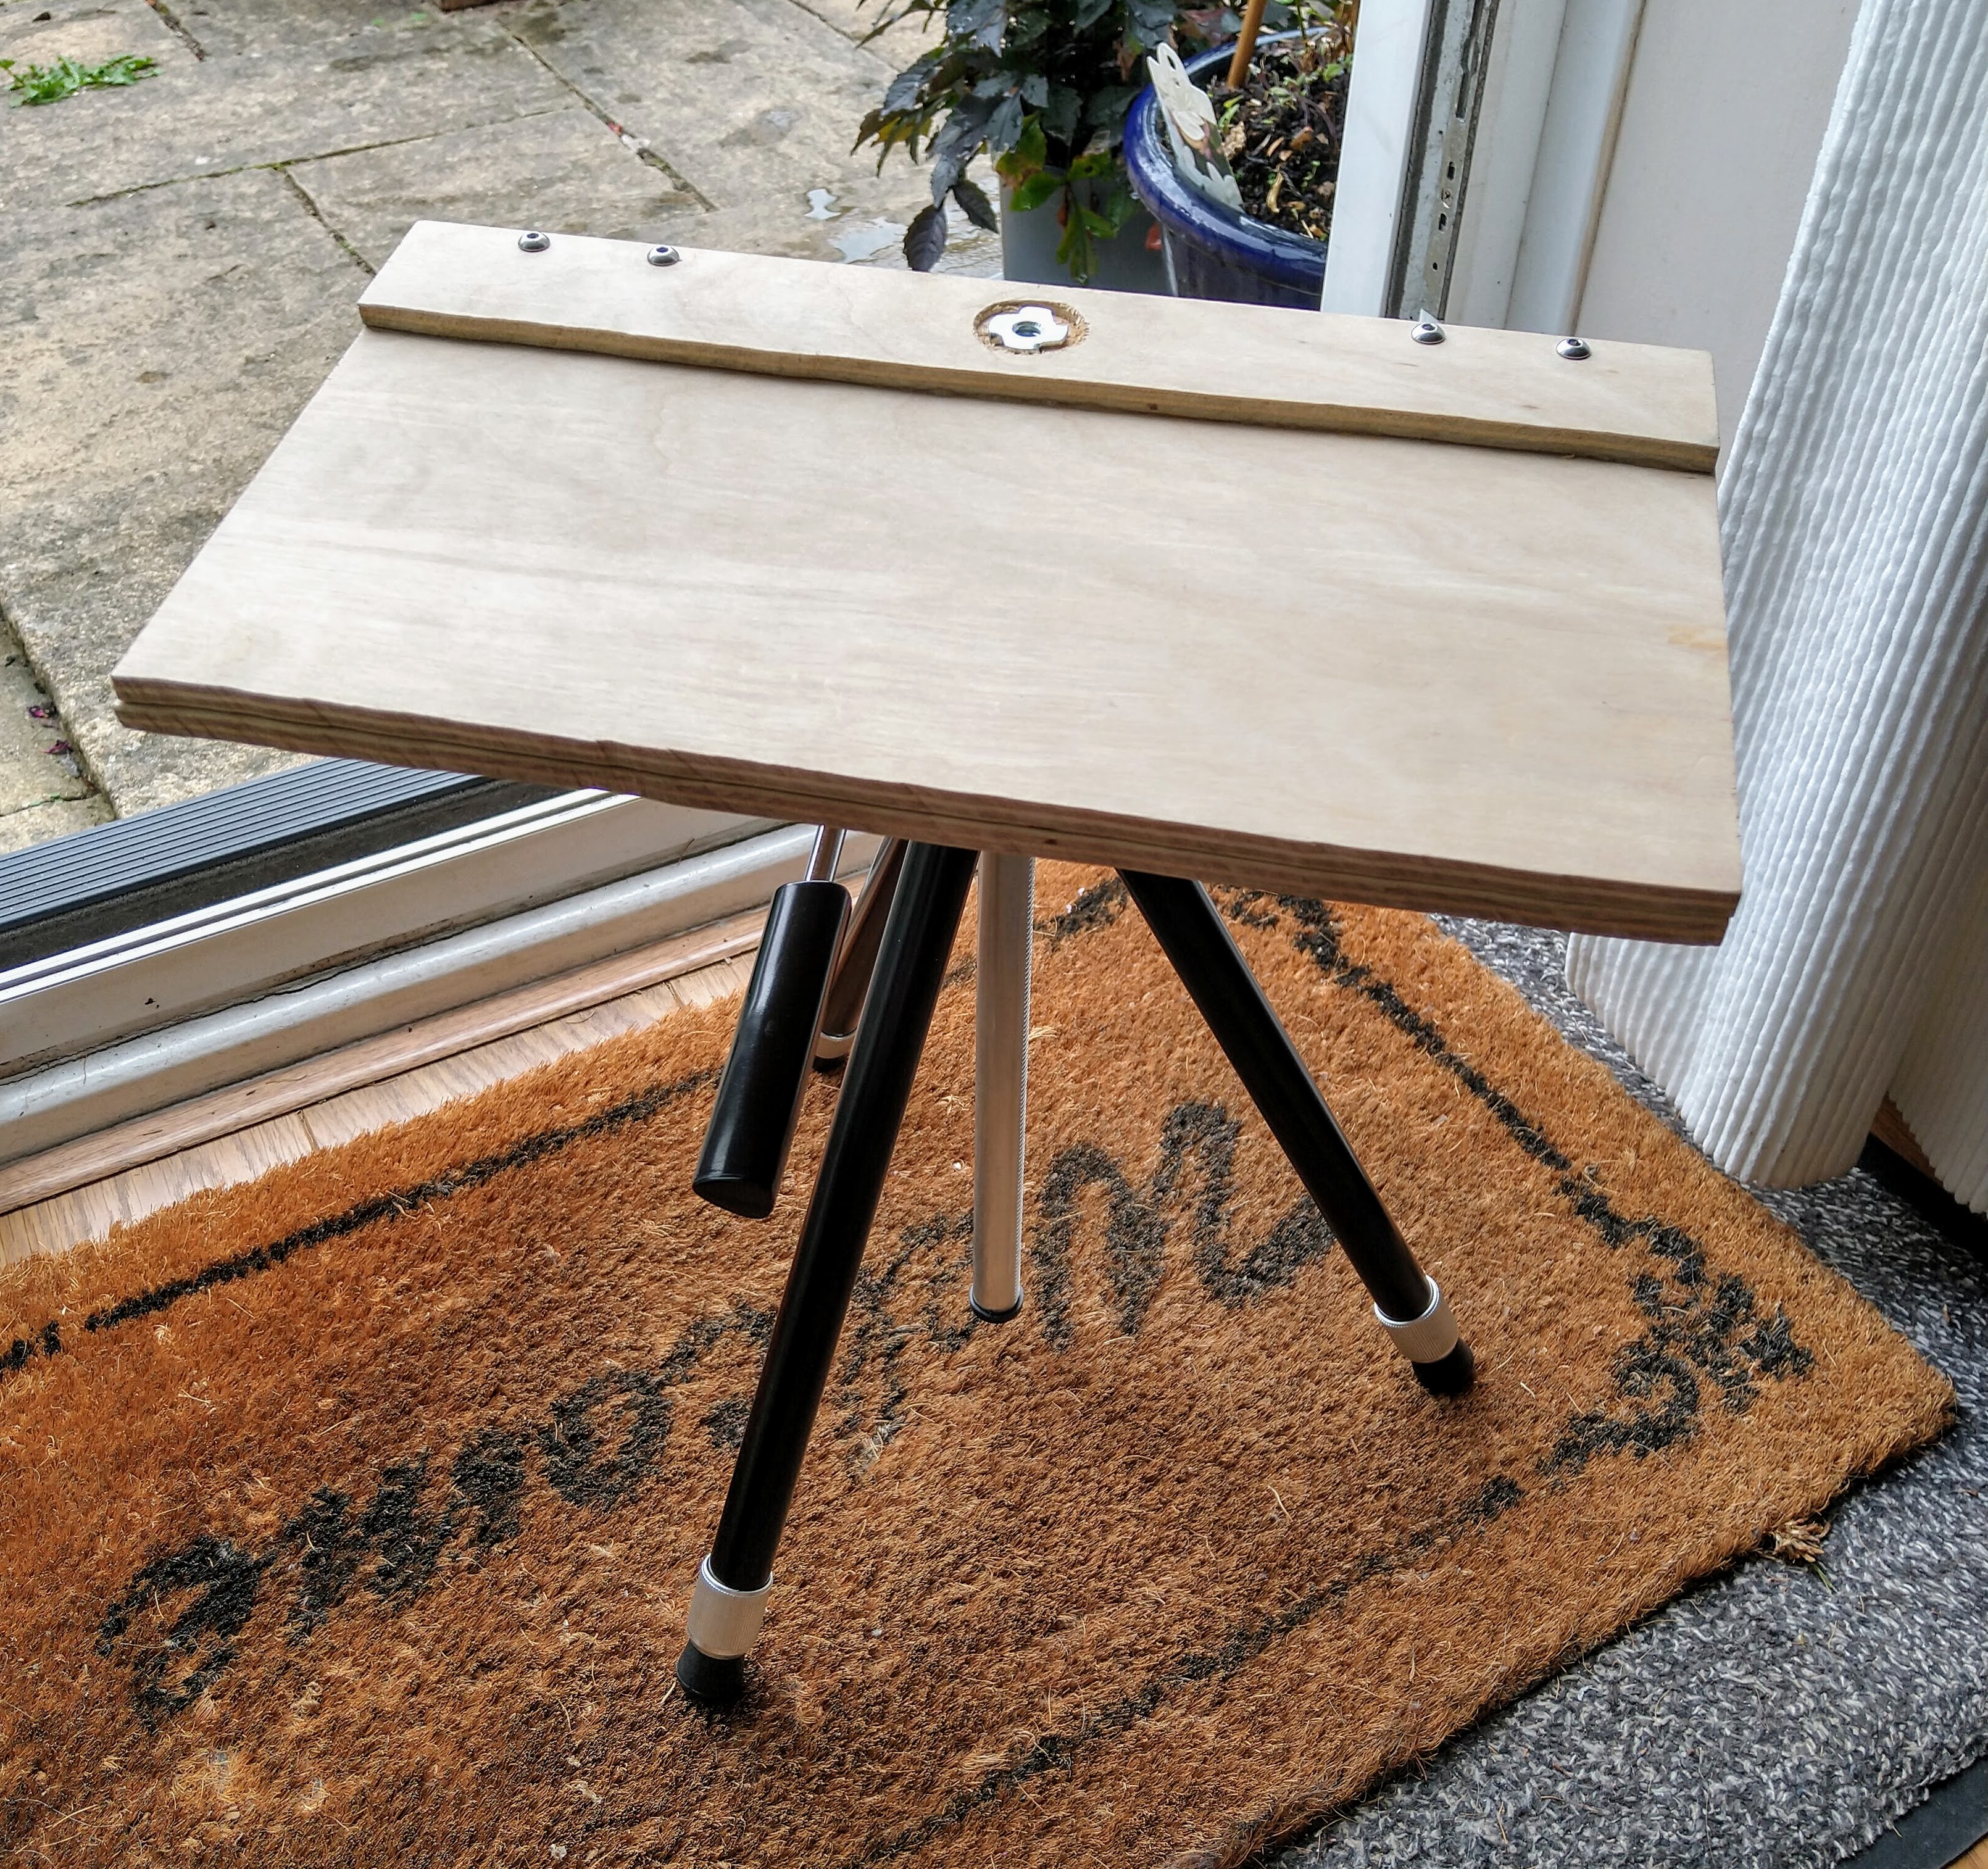
Completed Easel
I haven’t varnished or painted it yet. Still undecided whether I’ll add magnets to it for holding onto the metal paint tin.
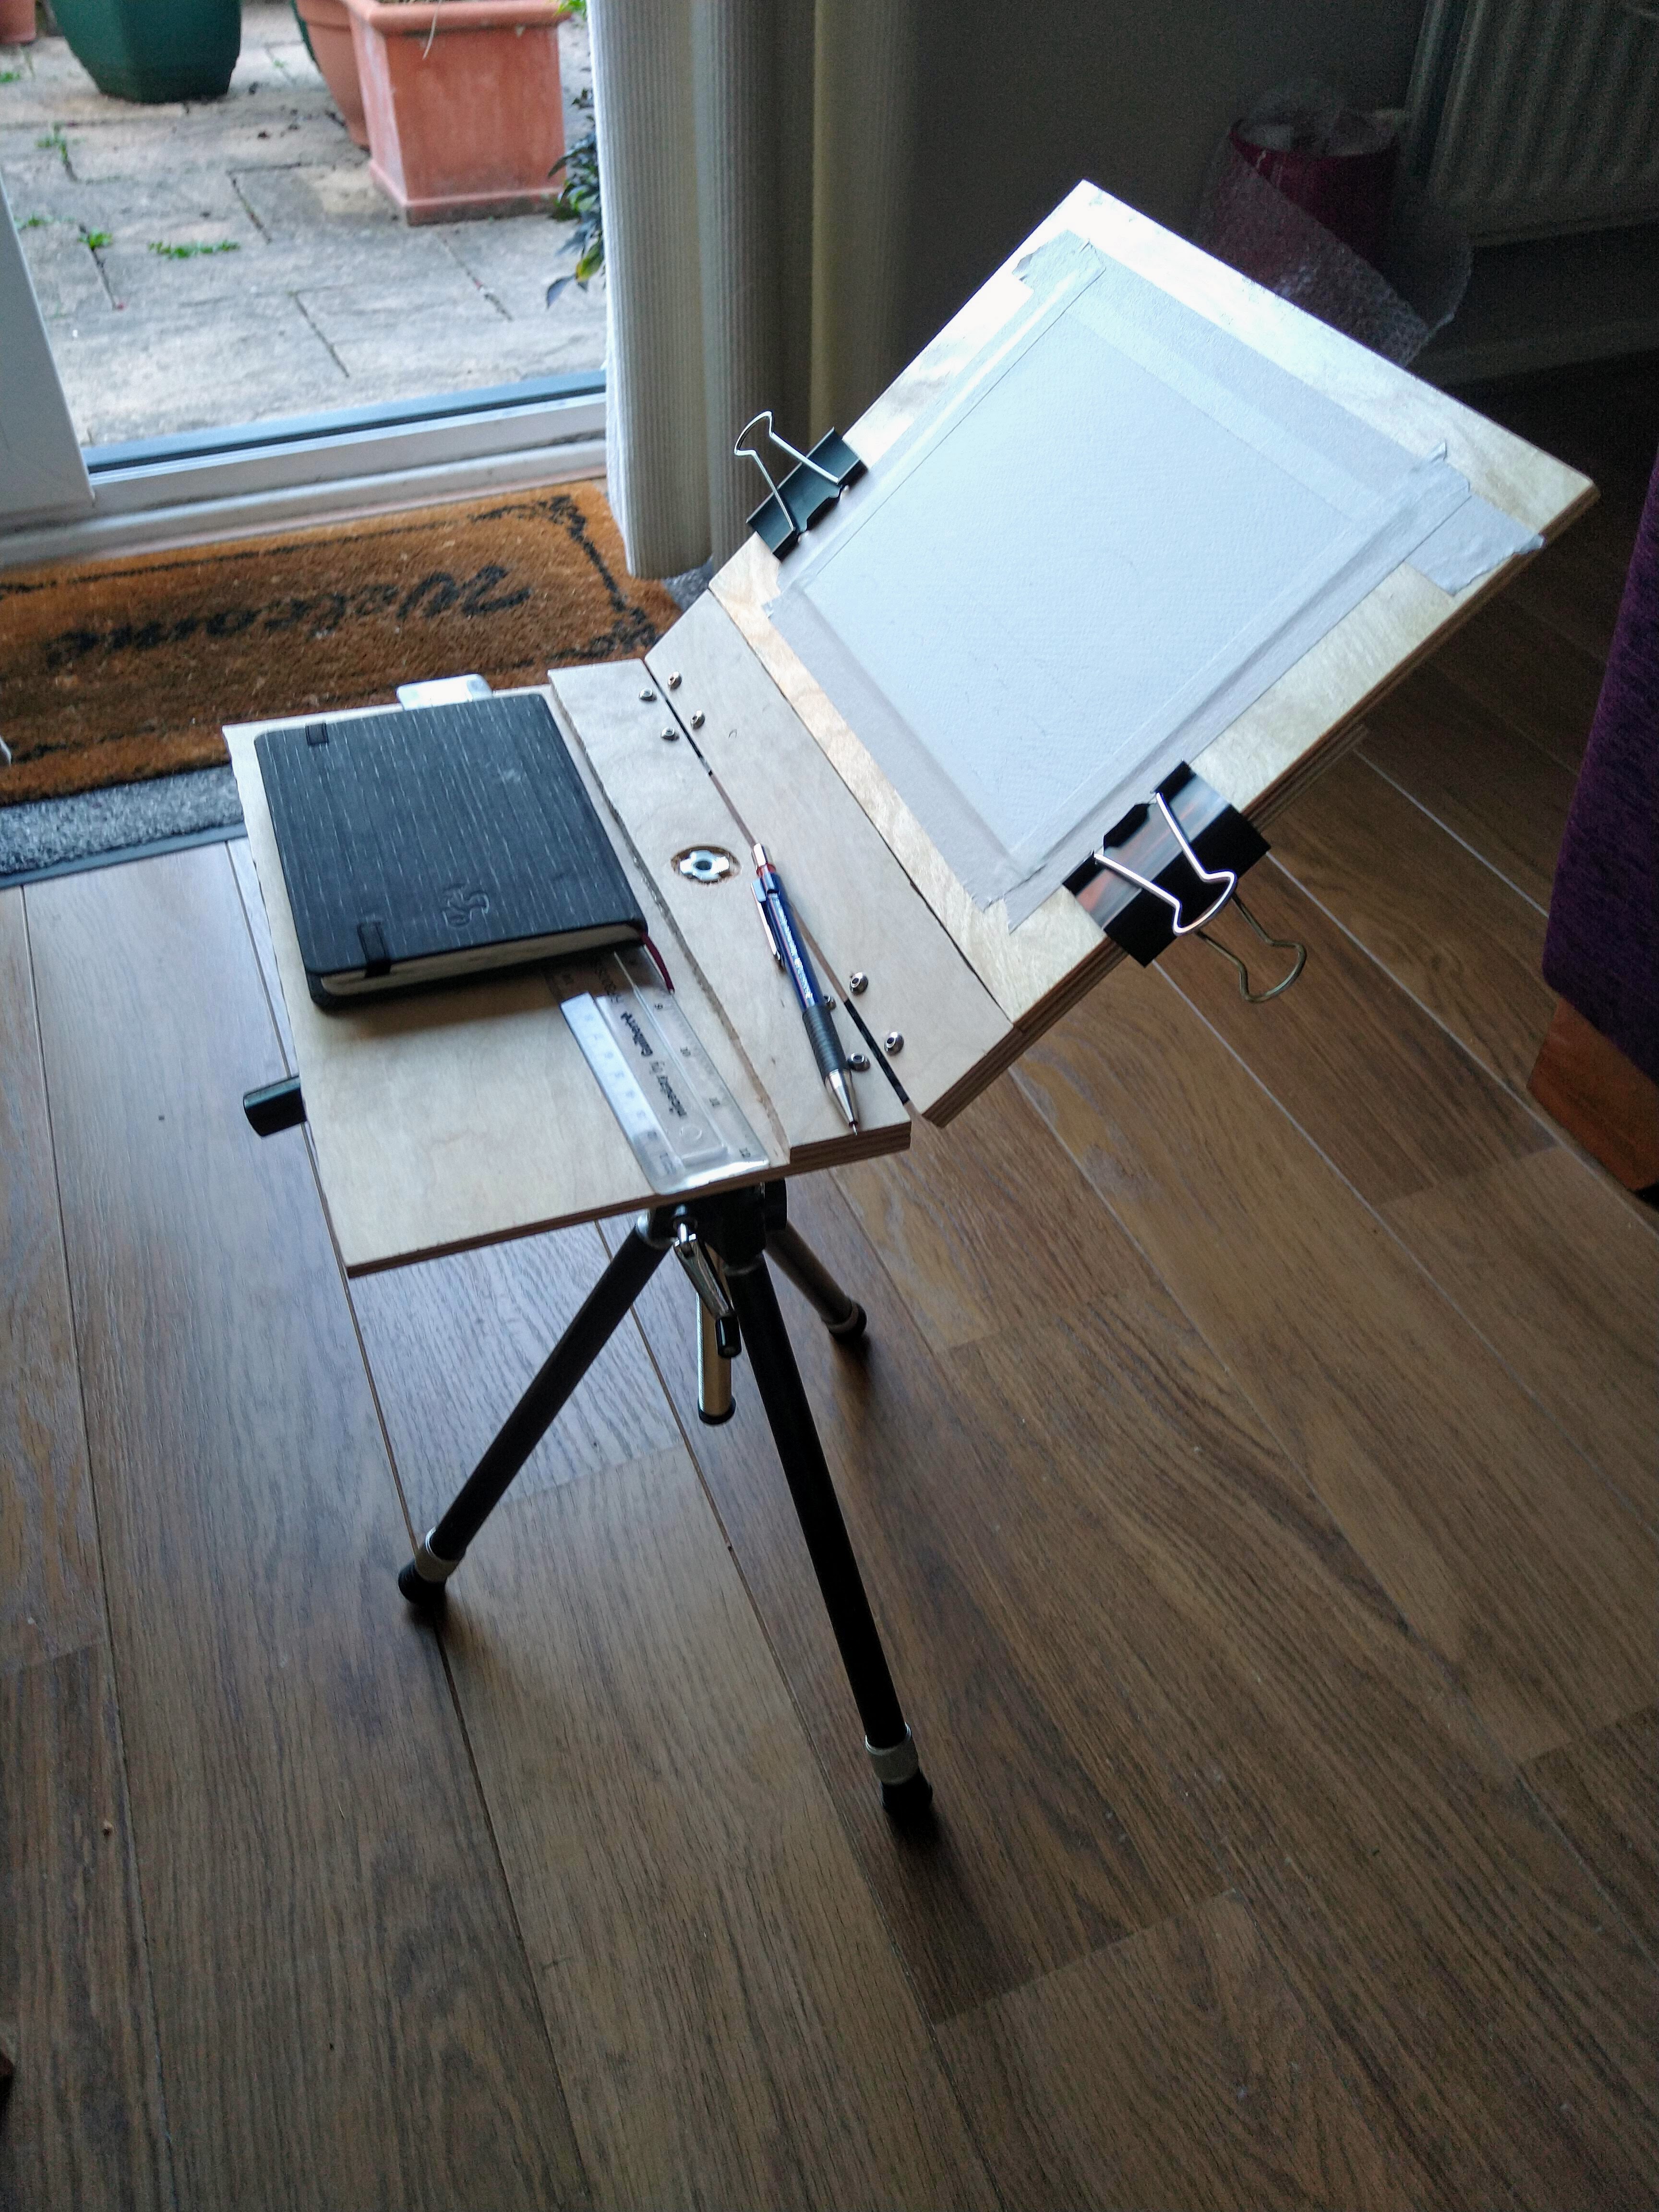
The easel here is mounted on a camera tripod. It’s quite stable and sits at a nice height for painting whilst sat on the bench. The clip on metal water containers work well. And the bulldog clips are perfect for holding the sketchbook and towel.
Update: 2022-08-12
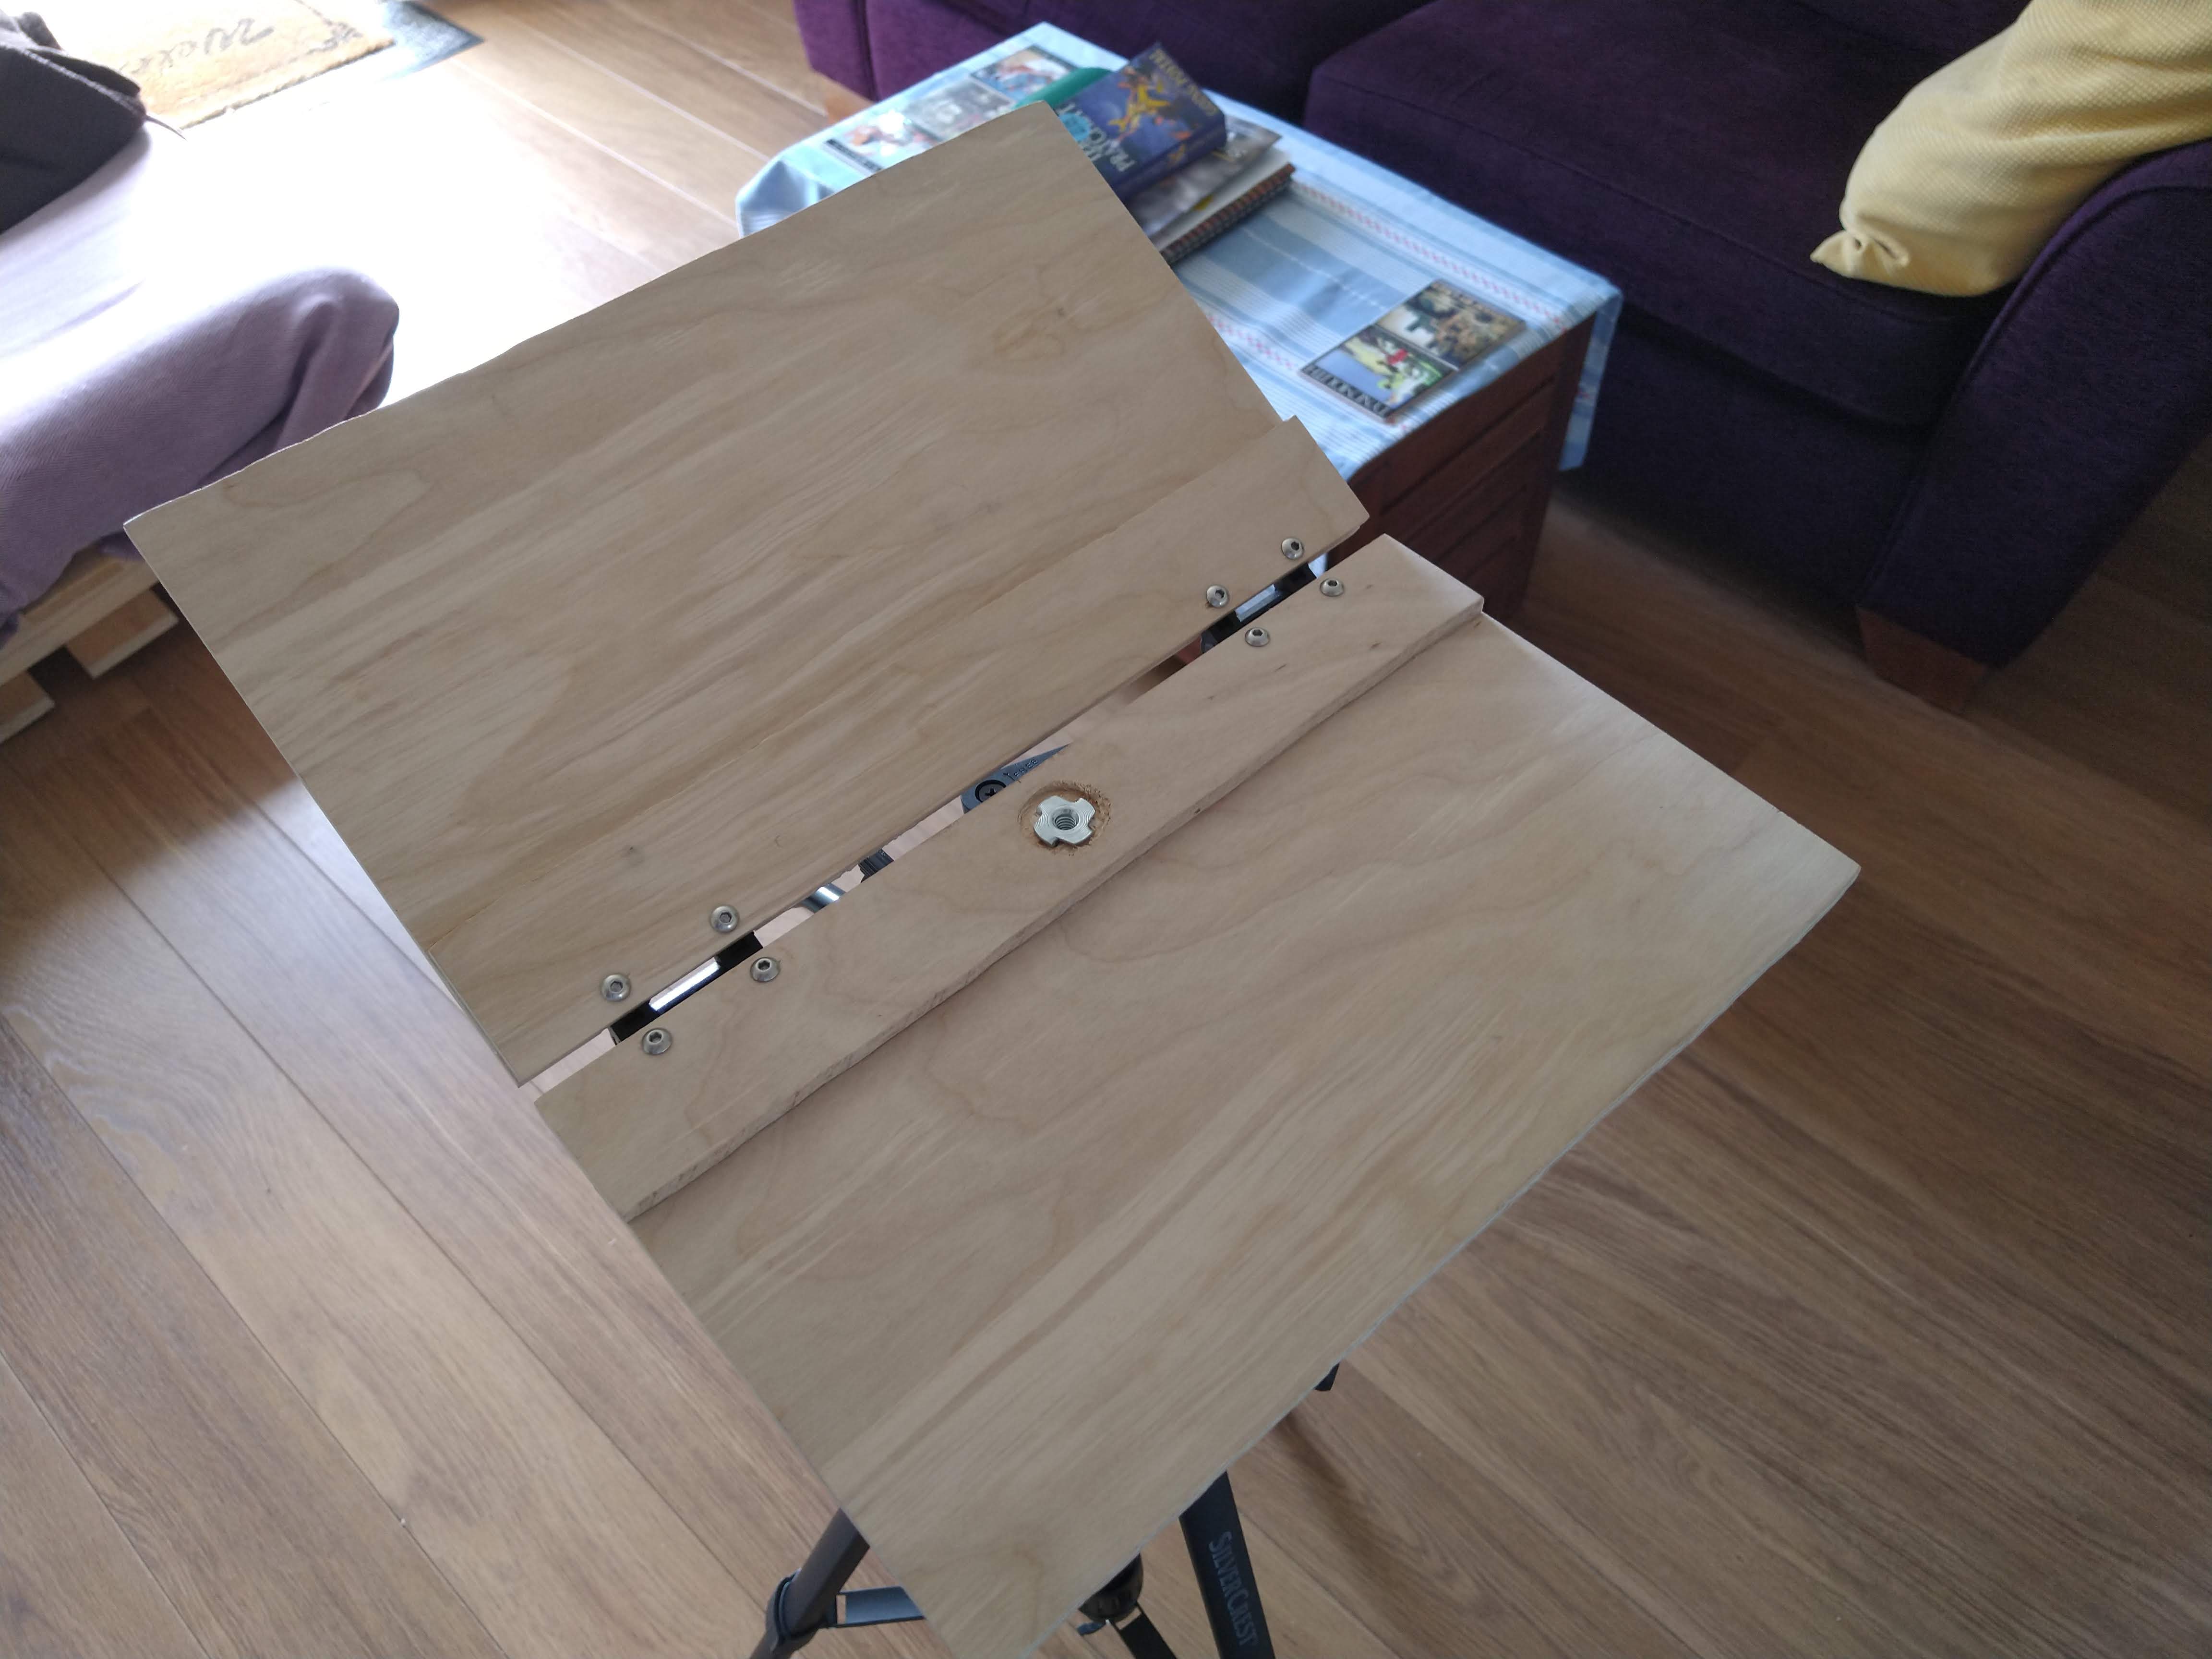
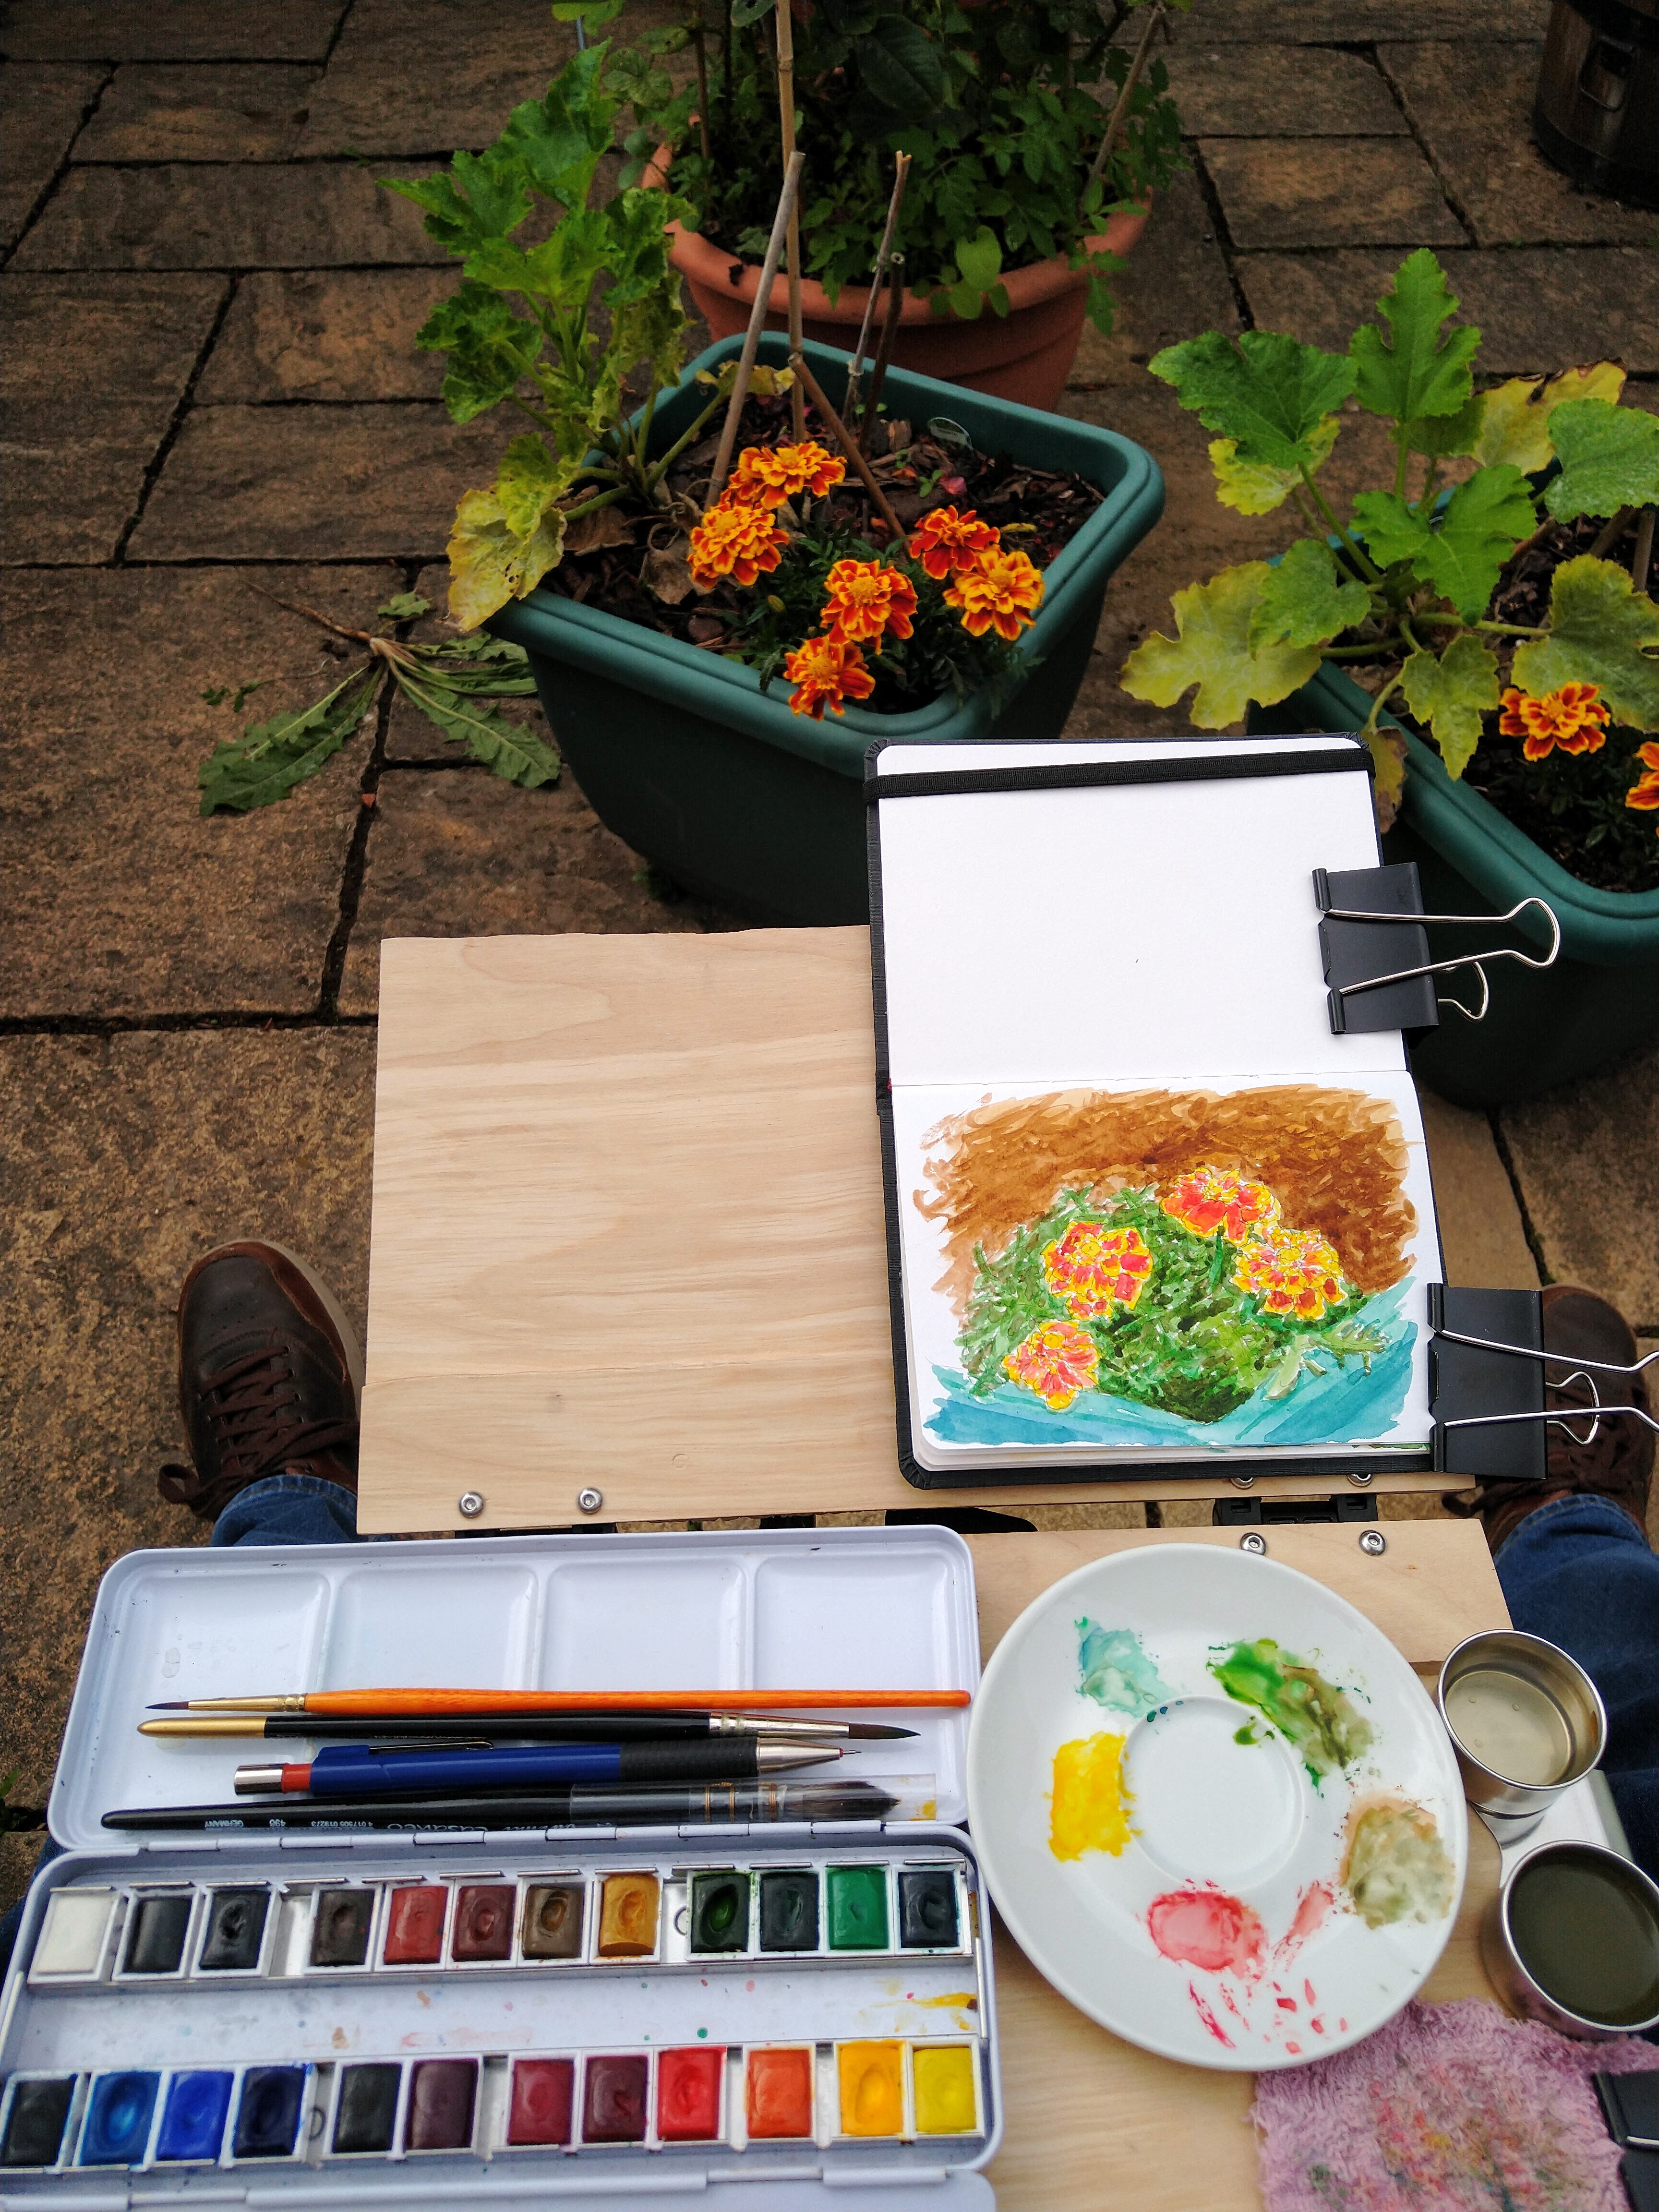
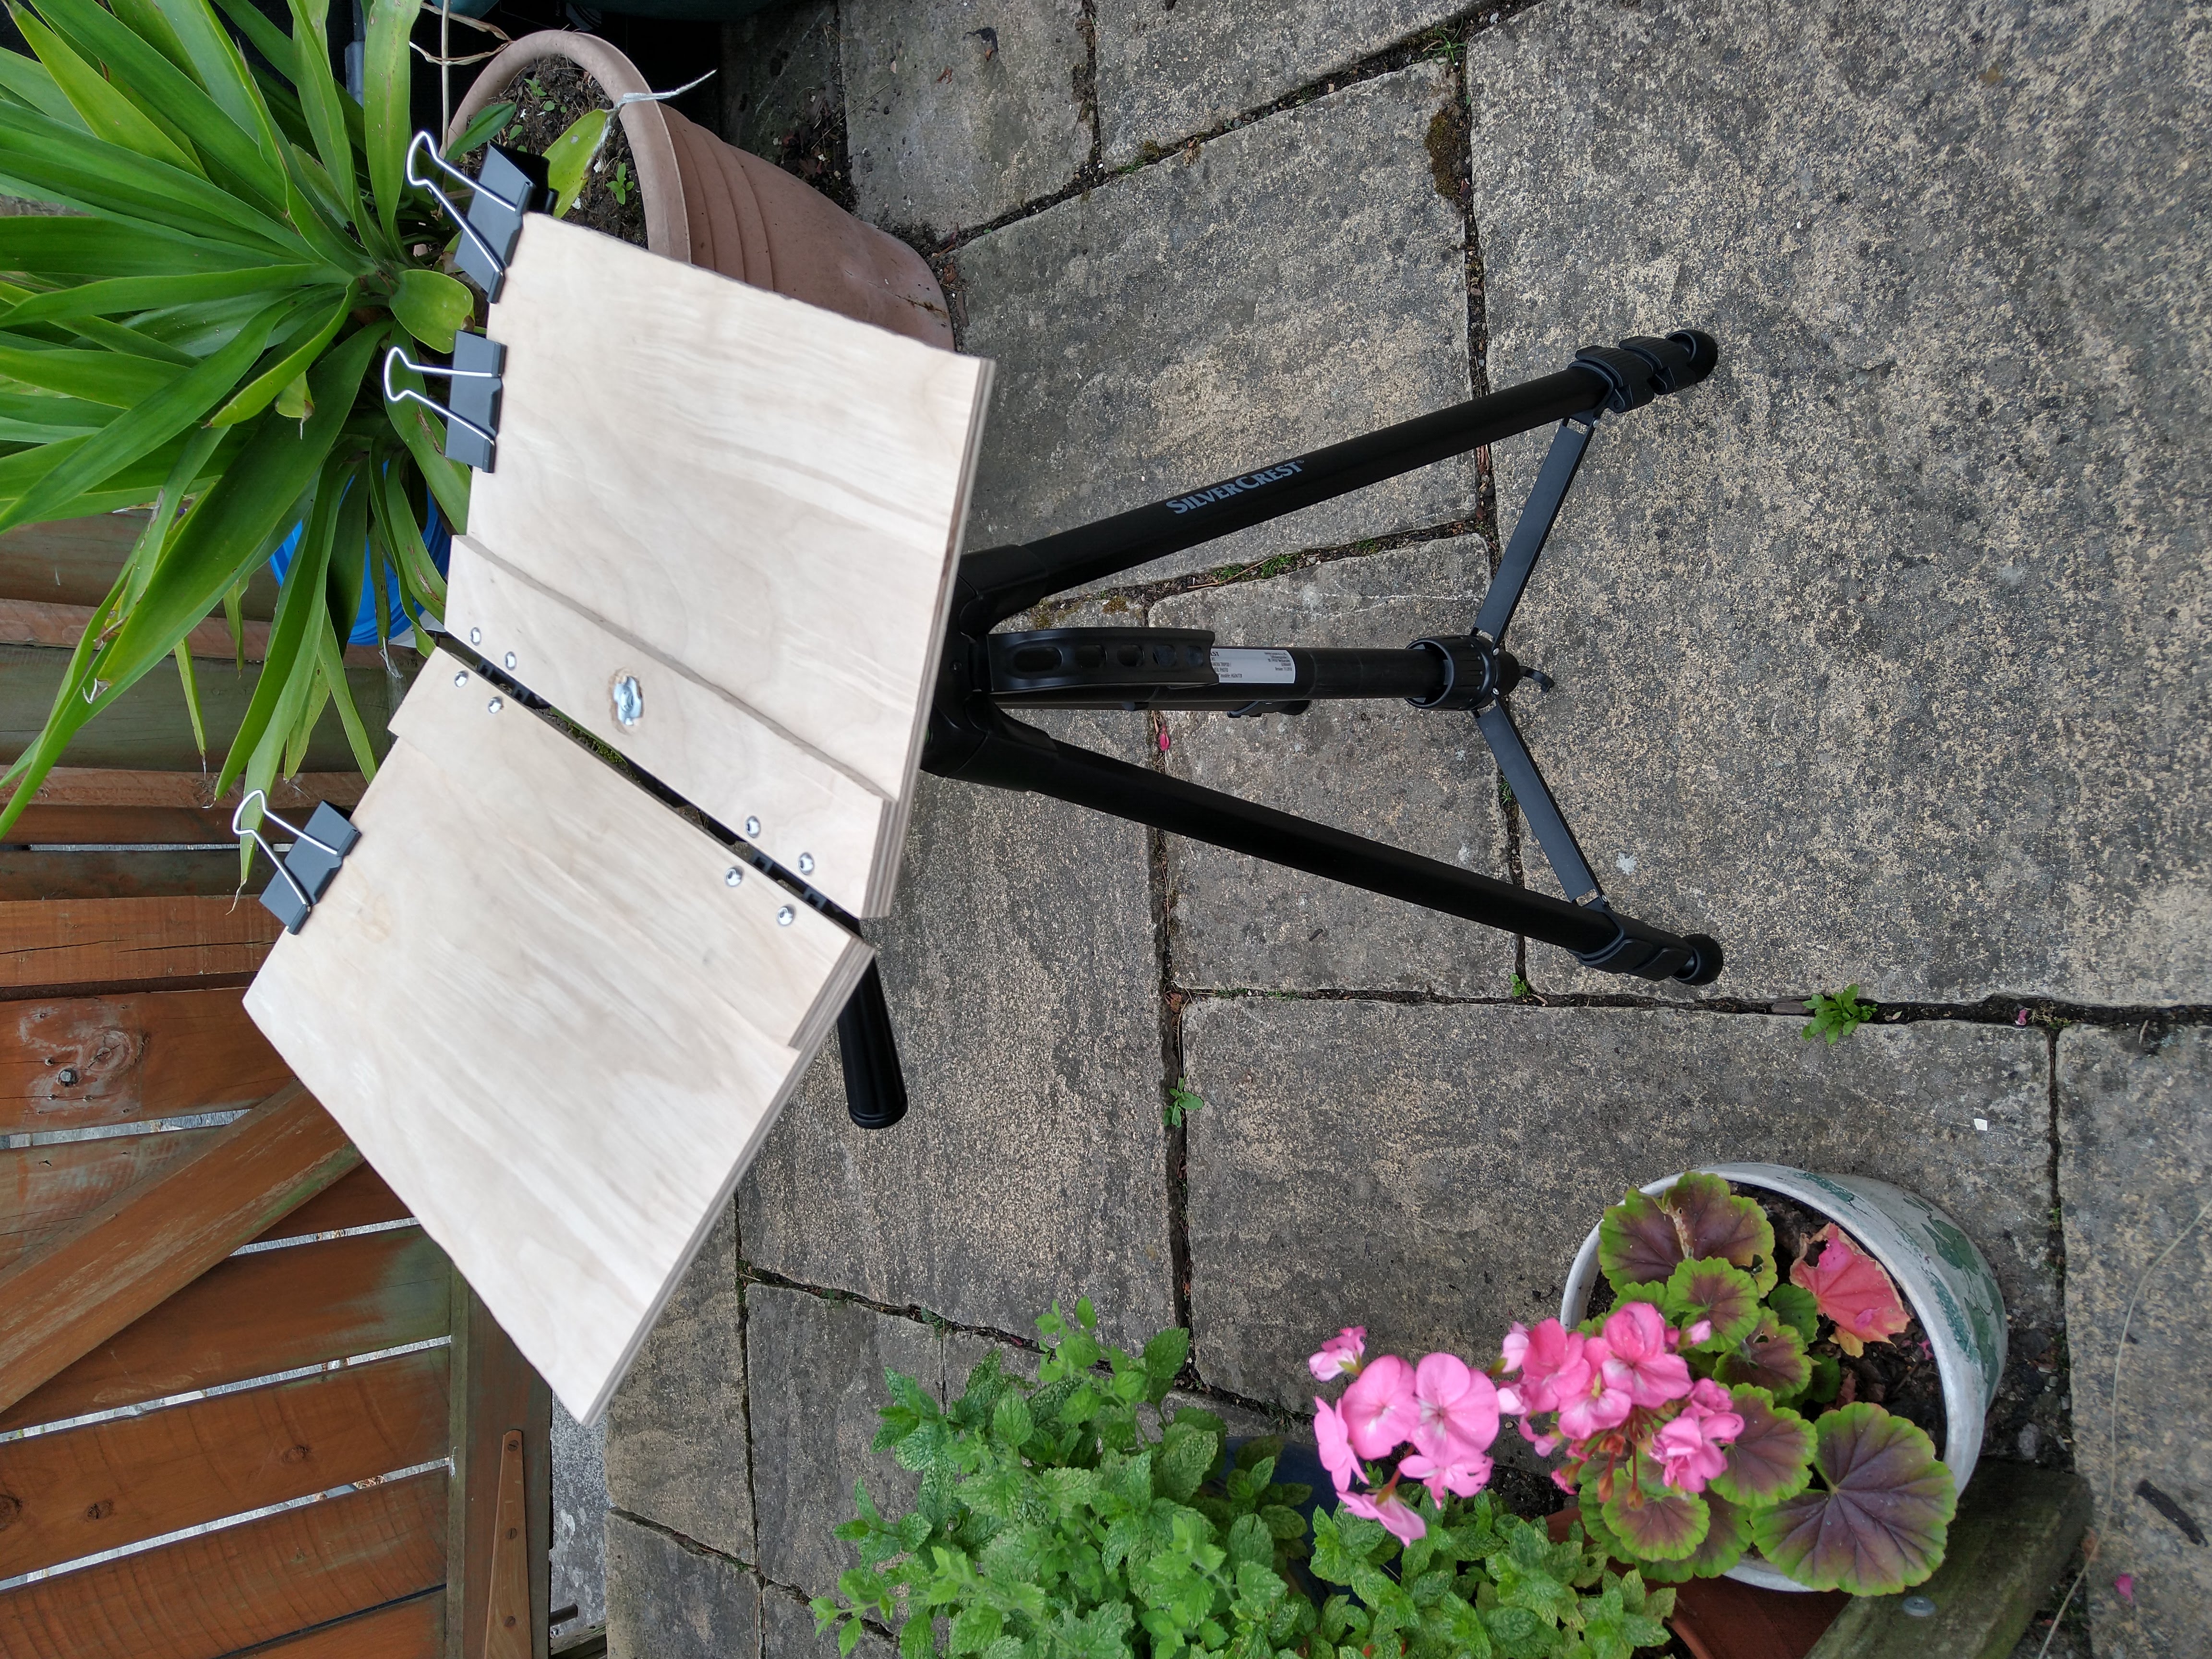
The tripod I used before is quite large when compared to the portability of the sketch easel. I stumbled on an old camera tripod that although much smaller was metal and quite sturdy. You can find plenty of second hand metal tripods online, under the label “vintage”, and for a fairly reasonable price. This is the sketch easel with an old Boots metal camera tripod - not sure what decade. It’s probably not clear from these pictures, but the legs are telescopic. So for standing up whilst painting it’s also comfortable to use. Here I have also attached the A4 drawing board to the easel with taped down A5 watercolour paper. I’m considering adding a T nut to go through in the other direction next.
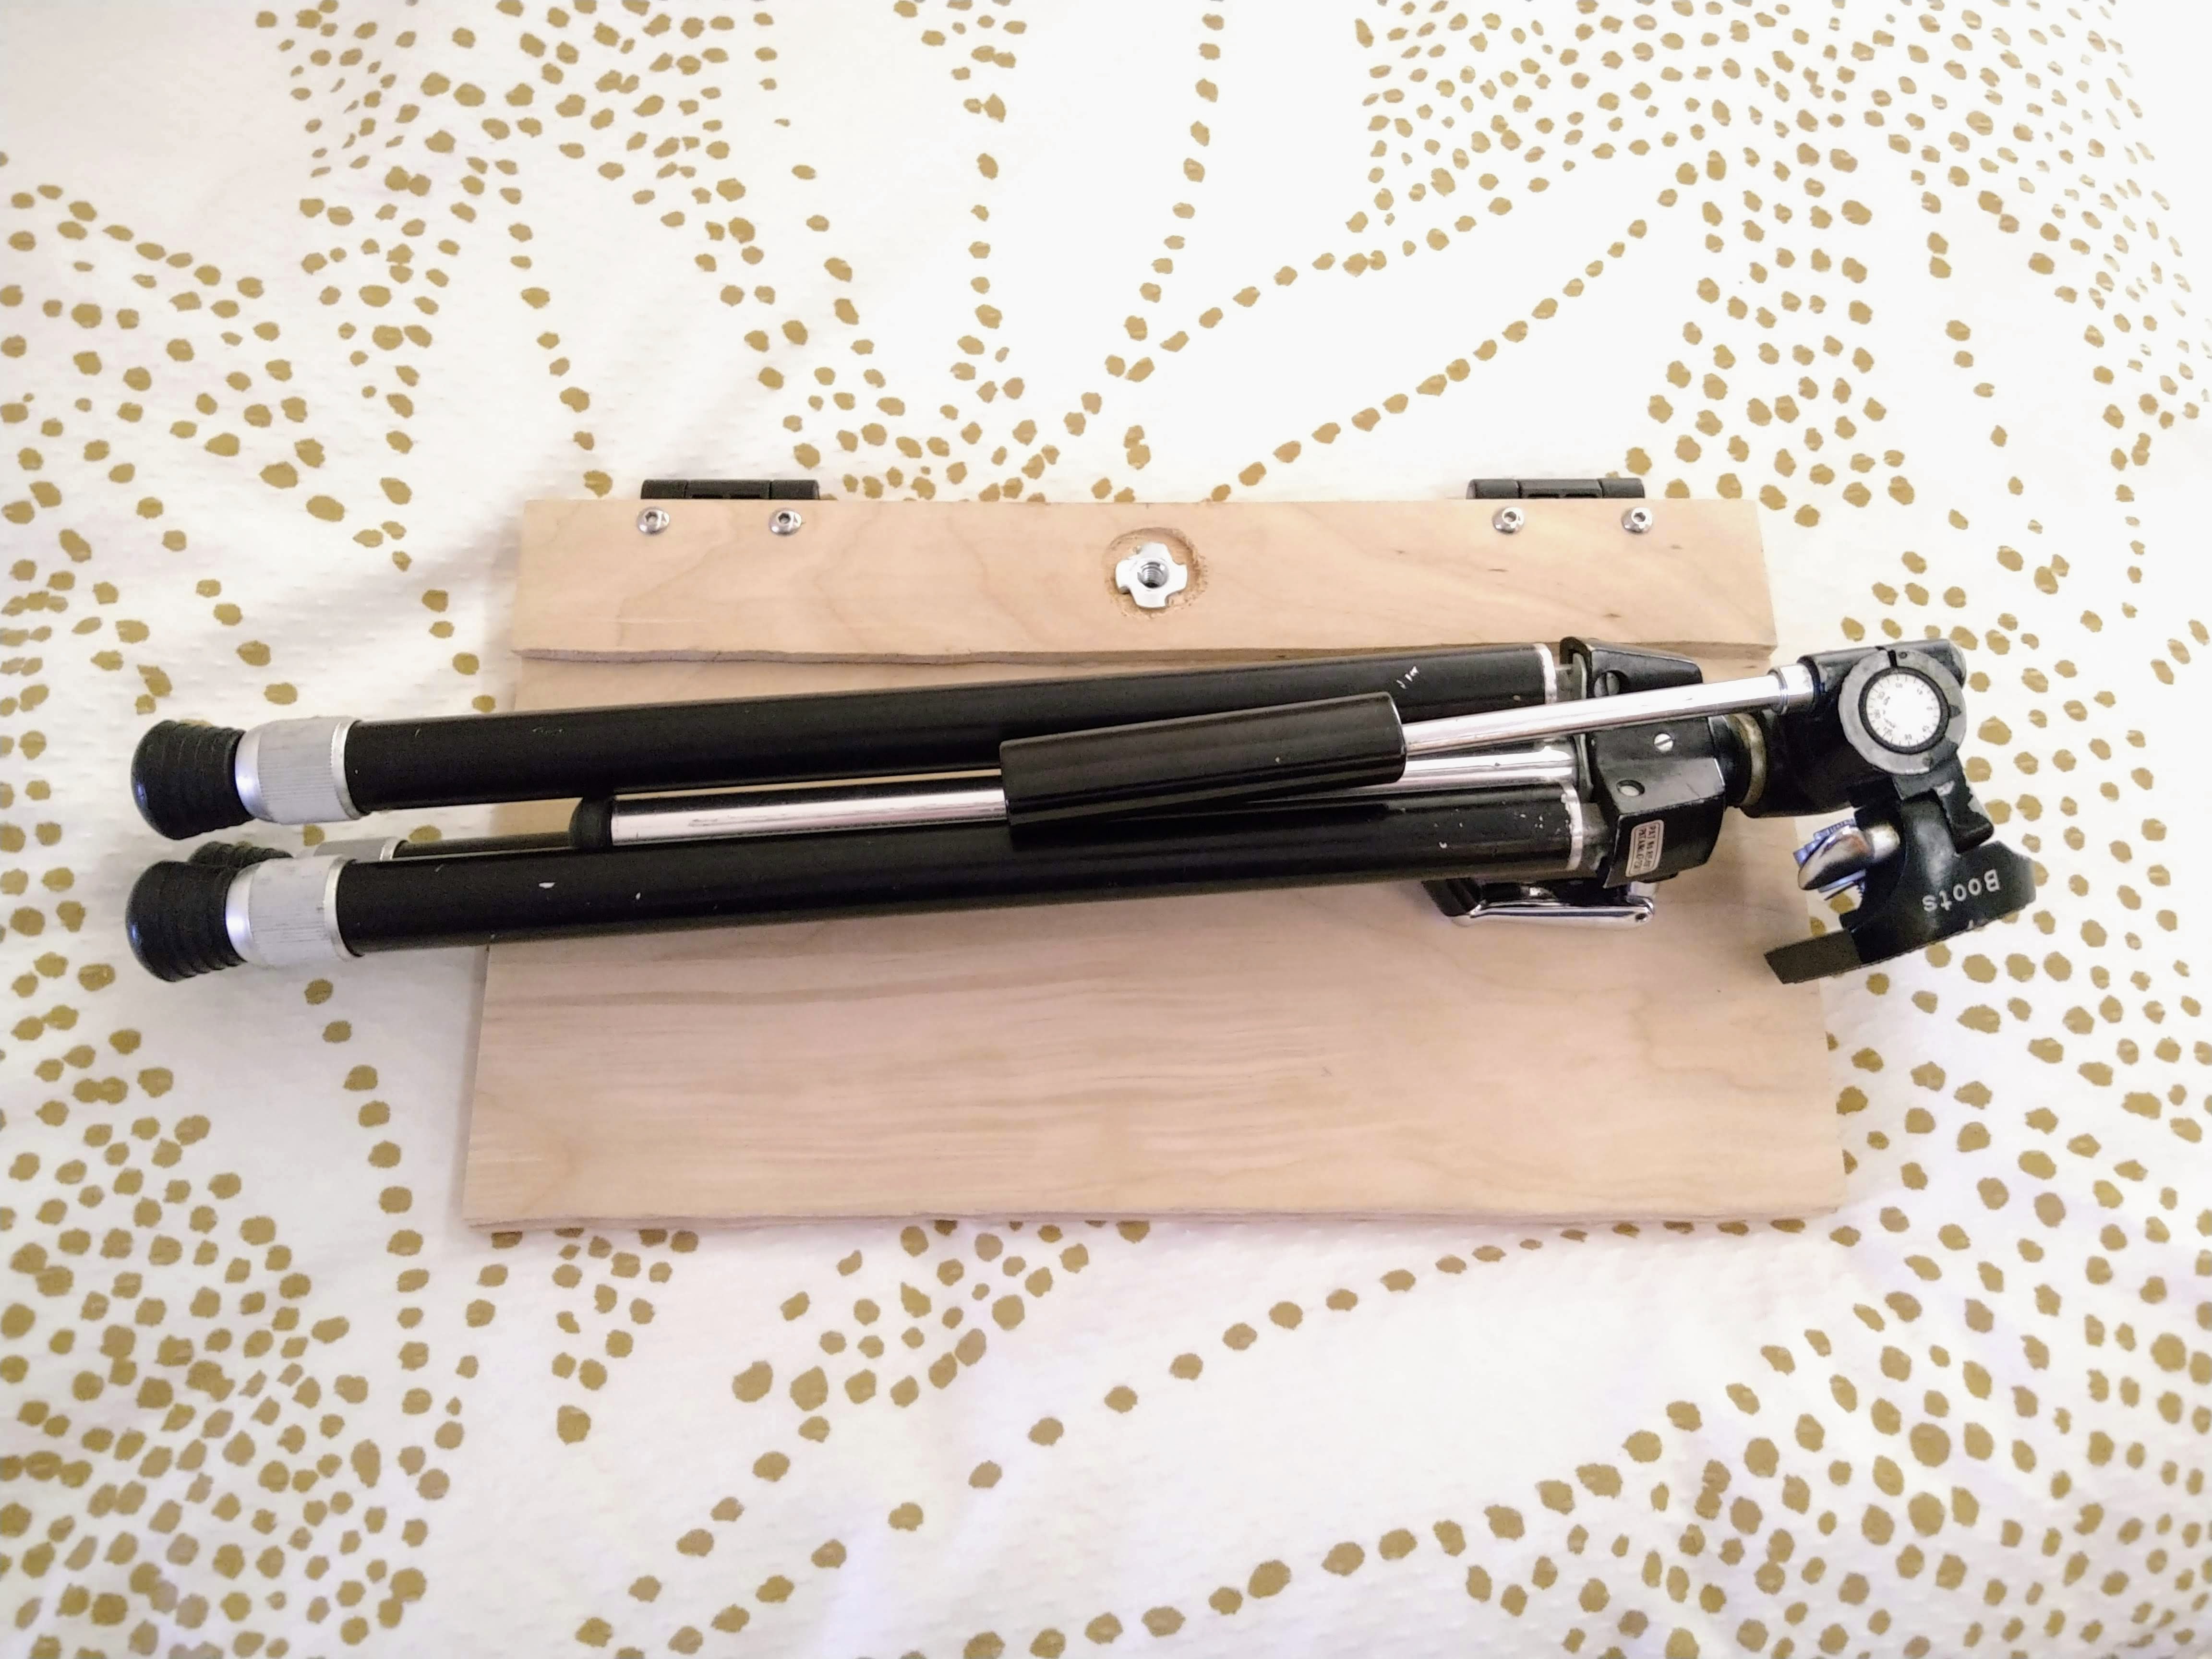 |
| The folded up tripod isn’t too much longer when compared to the sketch easel |
 |
| For seated painting the telescopic legs don’t need to be extended |
Update: 2022-08-15
Added the extra T nut from the other direction so that the sketch easel can be mounted in either orientation.
 |
 |